Showing posts with label Basil. Show all posts

Monday, July 2, 2012

Pesto

I grew up in a world free of food allergies. It wasn't until I started college that I was introduced to people who had to food allergies. My first college roommate had Celiac disease, allergic to a variety of nuts and was also a vegetarian who at the time didn't like green vegetables. From that point on I seem to find more and more people who have various food allergies. I try to be accommodating as possible when I am cooking for people with allergies. I will also accommodate vegetarians if I am cooking for them. I haven't made up my mind on vegans yet (to this point I haven't had to make this decision). 

So what does any of this have to do with Pesto? Pesto for those who may not know is traditionally made with pine nuts, basil, olive oil and salt. This means if you are sensitive to tree nuts pesto may have to be avoided! This past weekend I had a ton of basil (thank you Trader Joes) and a worry that it would go bad before I got to eating all of it fresh. The best solution was to whip up some pesto, and considering ESFSW and I were planning on making pizza Saturday night. ESFSW is allergic to peanuts and while peanuts (which are legumes) and pine nuts (tree nuts) are not the same thing I felt like once upon a time I heard that these allergies can track. I decided since I had almonds I would try making pesto with almonds instead. As it turns out my roommates were also going to be making pizza so I was extra glad I decided to make pesto with almonds instead of pine nuts. 


Here is what I did:


In a blender or food processor. Process 1/4 to 1/2 cup of slivered almonds until you have almond crumbs


About 1/2 cup slivered almonds
 Pulsing the blender for approximately 1 minute resulted in course crumbs.


Coarse almond crumbs
 After another minute the almonds were in fine crumbs


Now they are done - fine almond crumbs
Added several cloves of garlic and a pinch of salt at this point and pulsed again til the garlic was indistinguishable.


Add olive oil - not too much about a 1/4 cup and pulse again.


Gorgeous!


Almond garlic paste


 Next add at least a cup of fresh basil leaves that have been rinsed and dried.


 Pulse until the basil is well chopped and incorporated. Add more oil if the mixture is too dry. Now add a couple splashes of balsamic vinegar and pulse again.


What a nice looking paste!
 Pulse til you have achieved your desired consistency. If you need to add more oil or vinegar please do. Make sure you taste a little bit and adjust the ingredients to satisfy your palate.


Finished!
The pesto was a great base to the pizza ESFSW and I made that Saturday night. I also had enough left over that I am hoping to have with some pasta and shrimp some time this week for dinner.


~ Happy Cooking! ~

Tuesday, June 26, 2012

Simple Shells

A couple weeks ago I posted the recipe for Avocado Stuff Shells, but today I am posting a simple stuff pasta shell recipe that can be a quick week night dinner made up of the left overs from my previous cooking adventure. I have learned from the years of being single and living off a graduate student stipend that you don't throw away any left overs. Over the years I have gotten creative at combining left overs to some really interesting meals. This one was a particularly good brain wave. I made a single serving since I was eating alone this night but this could be easily made for more than one. 


I had left over uncooked pasta shells that I boiled. I also had about 1/2 cup of unused ricotta cheese from the previously mentioned recipe. I also had recently bought a rather large amount of fresh basil from Trader Joes. I minced up enough basil to make 1/8 cup. I stirred this into the ricotta cheese with salt, pepper and granulated garlic to taste. Into the cooked pasta shells (4) that I have drained and rinsed I stuff the ricotta mixture and place the shells into a bowl. I stop the pasta with the left over marinara sauce that I heated in the microwave (heat in glass or ceramic!). I then topped the whole dish with some more fresh basil.

Voila! 

A great dinner for 1 on a week day night. I think it took me about 20 minutes (a good portion of that was just boiling and cooking the pasta!). To make this four 2 just double everything! 

Close up on the ricotta basil mixture!


Wednesday, June 6, 2012

Basic Marinara


Marinara Sauce - the starting point for most tomato based pasta sauces. While it is easiest to go to the store and buy a jar and heat n' serve it may not give you that taste and flavor you are seeking! The best sauces are always made from scratch and allowed to simmer for hours to intensify the flavors. Here is a recipe for a basic marinara which can be doctored with other ingredients to make other sauces.


~ Recipe ~

Olive Oil
1/4 diced onion
3 cloves garlic minced
28 oz can Crushed Tomatoes
15 oz can Tomato Sauce
6 oz can Tomato Paste
1 to 2 tsp dried basil
1 tsp dried thyme
1 tsp oregano
Tabasco Sauce (original) [This is not added for spice but to balance out the tomato paste with a touch of acidity]
salt to taste
* 1/8 cup shredded fresh basil

In a large pot heat olive oil on medium high heat. Add onion and saute, once it starts to turn translucent add garlic and continue to saute. Don't let the garlic burn. Add the crushed tomatoes and tomato sauce plus the dried spices. Once it comes to a simmer reduce the heat and continue to simmer for 30 to 45 minutes. Stir occasionally. Add the tomato paste and at least 10 shakes of Tabasco (I used closer to 20). Let simmer for another 30 to 45 minutes (up to 2 hours). Add fresh basil in the last 20 minutes. 

You can use this immediately over pasta, add additional items like mushrooms, sausage, peppers ect. To make it extra spicy use red pepper flakes or siracha added with the tomato paste and Tabasco. This sauce is excellent for bakes pasta dishes like my next post.

You can also easily make a double or triple batch and freeze portions of the sauce to be used later!


Happy Cooking!


Friday, March 30, 2012

Creamy Tomato Basil Soup


Tomato soup is one of those foods that I think is stamped in the American food vernacular. Often served with grilled cheese sandwiches as the meal to comfort and warm. I personally have not made a whole lot of strictly tomato soup. Tomato tends to be the base of a lot of my soups but never the main ingredient. I poked around online a bit looking at recipes and didn't really settle on any particular one, but took parts that I like from several and combined them with my own personal flourish!


Before you embark on this cooking journey, I will warn you that this soup will take a while to make. It is not a throw together, heat to a boil, and serve immediately soup. There are two long steps in this process, which can luckily be divided over the course of a day or two days. The soup will be best the longer it simmers. This allows the flavors of the ingredients to meld and intensify! It will be worth the wait I promise you!

Most of the needed ingredients

Here is what I used:

1 lb fresh grape tomatoes (if you have older ones that are getting wrinkly here's how to use them!)
garlic (at least 6 cloves)
olive oil 
dried basil (1 - 2 Tbs) - yes I mean the dried variety - fresh dried basil will provide the best flavor
30 oz canned diced tomatoes
1 to 2 yams or sweet potatoes depending on size (already cooked and soft)
1 tbs red pepper flakes
salt to taste
2 cups chicken stock - if you are vegetarian or vegan you can substitute with vegetable stock or water
1/2 & 1/2 - if you are dairy intolerant or vegan you can skip this ingredient.

This is what I did:

Pre-heat your oven to 425 F. 

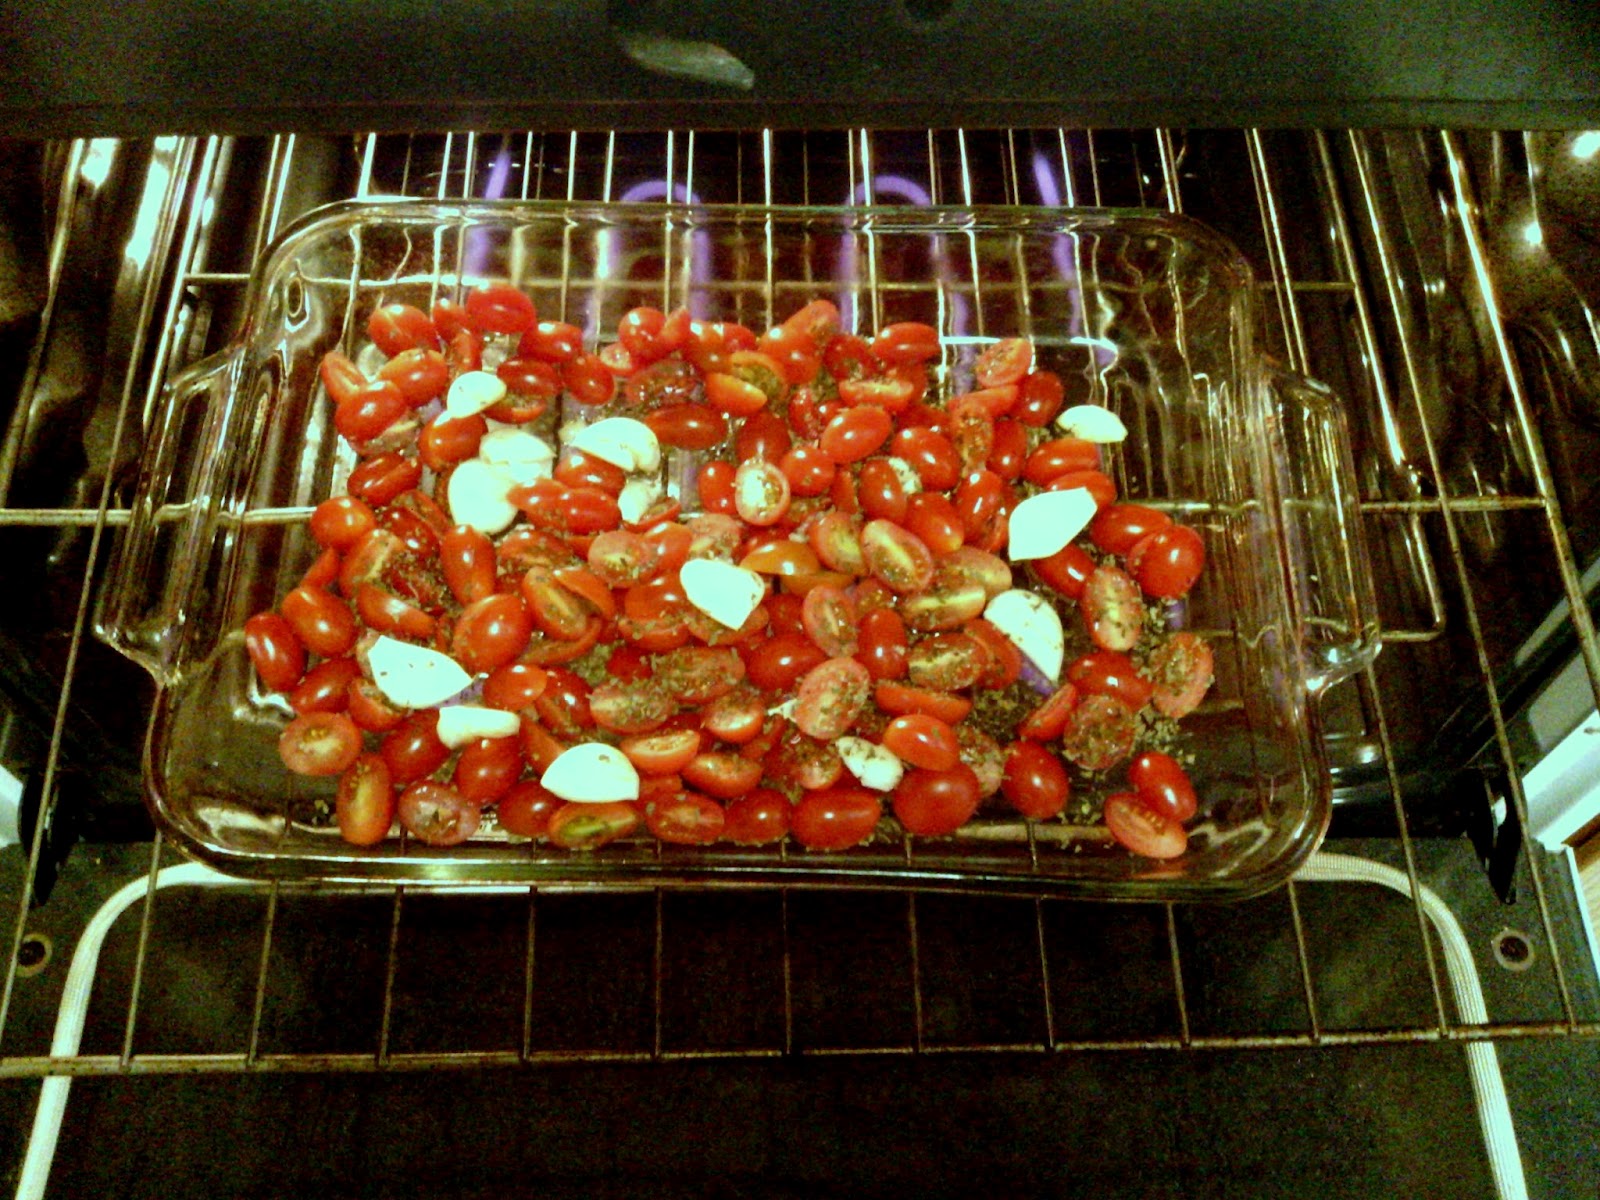
While the oven is heating, cut grape tomatoes in half and place in large baking dish (for easier clean up, line with foil). Crush several cloves of garlic and toss in with the tomatoes (I used 10 to 12 but some of them were rather small). Drizzle with olive oil, sprinkle with salt and douse with dried basil.

Place pan in oven and roast tomatoes for 30 to 40 minutes.

Tomatoes and garlic entering the oven
Toss occasionally while roasting and remove from oven once some of them are starting to char. Let pan cool. If you are doing this step ahead of time (up to 5 days ahead would probably be fine, longer if you plan on freezing them, although things do tend to lose their flavor in the freezer over time). If these are roasted ahead of time, store in a air tight container in the refrigerator. Make sure you save as much of the liquid and scrapings as possible for this is where a lot of the flavor is be found.

Roasted Tomatoes just out of the oven...mmmm they smell good!

Next in a large pot heat some olive oil. Once warm add diced onion and saute until translucent and soft. The longer you saute the onions the better. If you want even more garlic flavor you could add some minced fresh garlic at this point.

Onions starting to cook

Once the onions have started to soften, add cooked yams. I had two small yams in the freezer left over from Thanksgiving! I had been wondering what to do with them and figured this would be a good use for them since they wouldn't be that good re-heated and eaten on their own.

Add the yams

Smash the yam up with a spoon. Add more olive oil if the mixture is getting dry or sticking to the bottom of the pan. Make sure the stove is on high, but not too high that it starts to burn. Add some dried basil and the 1 tsp red pepper flakes. Let the onions and yam combine and start to meld with the basil and pepper. For anyone who might be shy of spicy foods let me put your mind at rest. The red pepper flake will not add that much heat, but will give the tiniest hint of spice and bring out some of the other flavors.

Smash up the yam

Next add the canned diced tomatoes. I used half regular and half fire roasted. Stir to combine all the ingredients.


Pour in the chicken stock. Add the roasted tomatoes and garlic and the remainder of the dried basil.


Turn down the heat to low/ medium low at this point to let the entire thing simmer for about 20 to 30 minutes. This allows the flavors to mix and intensify as some of the liquid cooks off. Give the soup a taste and add more basil or salt to taste. Be careful with the salt because as you let the soup cook it will get saltier.

Once the soup has simmered for a while pull out the immersion blender and blend. If you don't have an immersion blender (in picture) then you can use a regular blender and blend batches of the soup. Make sure if you use a regular blender to be careful. Blending hot liquids can lead to explosions so let steam escape as you blend!

Blending the soup - keep the end fully immersed or else soup will splatter up towards you!

Depending on your time constraints let the soup simmer for another 20 to 30 minutes. Now comes and optional part! If you want your soup extra creamy you can had half and half or heavy cream (using anything else will make the soup too watery, if you want to avoid the fat just skip this step). I was planning on freezing half the soup so I removed the portion I wanted to freeze before adding the dairy product. I have never found dairy based soups freeze and thaw very well. 

Half and Half

Stir in Half and Half
 Serve with toast or cheese and sprinkle basil on top!


 I thought the soup was excellent! I may in the future tweak the recipe a little, but nothing major. If you don't have yams you could also use carrots - about 4. You would cook these with the onions. Here you would not  add the diced tomatoes until the carrots are soft. Or you could roast the carrots ahead of time (or at the same time as the tomatoes, but in a separate pan). I hope you enjoy!