Showing posts with label Tomatoes. Show all posts

Sunday, July 1, 2012

Spinach Tomato Potato and Egg Salad


Dinners that are fast, fresh, cheap and delicious are not always the easiest to come up at the drop of the hat, but is the holy grail of week night cooking. In the winter the solution is easy - stews and soups that I make in big batches and freeze. In the summer I usually just make big salads, but I was craving something a bit more creative than just a salad recently and then I had a brain wave! I had spinach, eggs, tomatoes and potatoes!

What I present here is by no means fast since I had to roast the potatoes! But, with a little fore thought you could easily roast a batch of potatoes on the weekend!

Spinach, Tomatoes and Eggs, Oh My!


Here is what I did:

Pre-heat oven to 450 F. Clean and cut up 3 small red skinned potatoes (single serving). Toss potatoes in olive oil, sea salt, pepper and other herbs (as desired). Arrange on a foil lined cookie sheet and bake for 30 to 45 minutes (until soft). You should probably stir them around half way through the roasting time.

Meanwhile, put a pot of water on high heat. Once the water is nearly boiling add an egg. Boil for 15 minutes. Immediately remove from heat and chill in ice water (will help the shell peel off easier and the yolk from turning grey).

Tear up desire amount of washed spinach leaves. Half some grape tomatoes. Chop up the egg and add to the spinach and tomatoes in a bowl. Once the potatoes are done roasting add them while still warm to the partially assembled salad. Drizzle a little red wine vinegar and olive oil on top and enjoy. If you have crumble bacon on hand this goes well one top as well! Or grated cheese!


Obviously - when I made this salad it was not quick because I had to roast the potatoes. But I have repeated this when I had all the ingredients fully prepared and on hand and it took less than 5 minutes. I would like to point out the well balanced nature of this meal as well. Wouldn't you rather eat this for dinner or lunch than grabbing food out somewhere? Planning can be a busy cooks best friend during the week!

Happy Cooking!

Wednesday, June 6, 2012

Basic Marinara


Marinara Sauce - the starting point for most tomato based pasta sauces. While it is easiest to go to the store and buy a jar and heat n' serve it may not give you that taste and flavor you are seeking! The best sauces are always made from scratch and allowed to simmer for hours to intensify the flavors. Here is a recipe for a basic marinara which can be doctored with other ingredients to make other sauces.


~ Recipe ~

Olive Oil
1/4 diced onion
3 cloves garlic minced
28 oz can Crushed Tomatoes
15 oz can Tomato Sauce
6 oz can Tomato Paste
1 to 2 tsp dried basil
1 tsp dried thyme
1 tsp oregano
Tabasco Sauce (original) [This is not added for spice but to balance out the tomato paste with a touch of acidity]
salt to taste
* 1/8 cup shredded fresh basil

In a large pot heat olive oil on medium high heat. Add onion and saute, once it starts to turn translucent add garlic and continue to saute. Don't let the garlic burn. Add the crushed tomatoes and tomato sauce plus the dried spices. Once it comes to a simmer reduce the heat and continue to simmer for 30 to 45 minutes. Stir occasionally. Add the tomato paste and at least 10 shakes of Tabasco (I used closer to 20). Let simmer for another 30 to 45 minutes (up to 2 hours). Add fresh basil in the last 20 minutes. 

You can use this immediately over pasta, add additional items like mushrooms, sausage, peppers ect. To make it extra spicy use red pepper flakes or siracha added with the tomato paste and Tabasco. This sauce is excellent for bakes pasta dishes like my next post.

You can also easily make a double or triple batch and freeze portions of the sauce to be used later!


Happy Cooking!


Thursday, May 17, 2012

Gorgeous Tomato Spinach Quiche


I think some of you may have picked up that ESFSW and I like eggs - whether it is an omelette (his domain) or a quiche (my domain) we do enjoy a well prepared egg dish. I had been planning on making a fritta one weekend and informed ESFSW of this. His reply was "what is a fritta?" I told him it was like a quiche but without a crust! He thought for a while and said "can we have quiche instead?" I paused for a second and thought...I really didn't want to make a pastry crust. While they are not difficult I seem to be plagued by bad luck and problems that last several times I have made one and I really didn't want to deal with the roller coaster of emotions that go along with a failed pastry crust. Now I know it is ridiculous to have yourself worth wrapped up in the success of a pastry crust and yet some how I do! When one turns out I am flying above cloud nine and when it fails I am in purgatory. I think the most upset and angry ESFSW has ever seen me was when I realized I had seriously screwed up a pastry crust of a quiche. I mean with three ingredients: flour, fat and water, how one earth can one forget one!! And yet I did. I blame it on my roommates! Some how they have frequent success using oil for the fat and so I have tried, and tried and tried and have yet to turn out a pastry crust that I find acceptable. So I went back to my roots and returned to Crisco and butter....ah my old friends! 


What I used:
Crust -
1 1/4 cup flour
1/3 cup Crisco shortening (vegetable shortening)
2 Tbs butter
1/2 tsp salt
~ 2 to 4 Tbs ice water
* optional 2 tsp cayenne

Filling - 
1/4 onion - sauteed
10 medium mushrooms sliced and sauteed
2 Roma Tomatoes sliced and de-seeded
2 cups fresh spinach leaves
8 eggs beaten well
1/8 to 1/4 cup milk
1/2 to 1 cup Shredded cheddar cheese
Olive oil
Salt and pepper

~ Crust ~

In a medium bowl measure out flour and salt (and cayenne) - give the ingredients a quick stir. Add shortening and butter. With your hands (take off any rings - saves cleaning them later!) or with a pastry cutter or two knives incorporate the crisco+butter with the flour until the mixture resembles sand clumps. Add 1 to 2 Tbs ice water and incorporate into the mixture until it starts to come together. If it is too dry add more water. Don't over water you want the dough to be a tad dry but holding together pretty well. Turn out dough on to a large sheet of waxed paper. Wrap up and refrigerate dough for ~ 30 minutes (up to 1 day).

ESFSW does have a rolling pin - so a wine bottle stood in as a substitute!

When ready - unwrap dough and form a ball - leave it on the wax paper. Cut another sheet of wax paper and put it over the top of the ball of dough. Using a rolling pin (or anything about a foot long and round). Roll out the dough into a circle. Once it is the desired size and thickness to fit into a pie plate remove the top later of wax paper. Put the pie plate over the top of the exposed dough and with one motion holding on to the bottom layer of wax paper and the pie plate flip. Remove the wax paper and arrange the dough into the plate and style the edges any way you please! Set aside while you prep the other ingredients.

Rolled out dough

Crimping the edges
~ Filling ~

In a fry pan saute onions and mushrooms til they are cooked through in either butter or oil (your choice - just never use margarine because I may have to hunt you down and lecture you on why this is NOT a healthier alternative to butter! I'm a chemist so I know!).

Set the onions and mushrooms aside. Mean while heat a little olive oil in the pan. Once hot add the de-seeded tomato slices to the pan in a single layer. Let them cook about 2 to 3 minutes each side. 


Once those have cooked - turn off heat and set aside. In a large bowl beat eggs with the milk and a dash of salt and pepper (and any other spices you want). If the cheese isn't shredded yet you should get on that! Or in my case get a kitchen helper to do it (aka. ESFSW).

Bring the pie plate with the crust back over and layer the mushroom and onion mixture with the fresh spinach leaves (make sure that they are well washed and dried). Pour the egg mixture over the top of this. Carefully lay the tomatoes on top of the egg mixture and sprinkle the cheese on top and sprinkle some pepper for good measure! Now place the assembled quiche into a pre-heated oven at 375 F. Bake for 40 to 50 minutes. The egg should only jiggle the slightest when it done. Remove from oven and let rest for 10 minutes before cutting and serving.

Assembled quiche ready to be popped into the oven!

The baked quiche resting after all its hard work in the oven!

Using fresh spinach means that - it ribbons through the quiche , as seen by this cross section.

We served the quiche with mango and grape fruit salad and paired it with a dry rose wine. It was a lovely meal. and I was thankful that my crust came out wonderfully!

It looks as lovely as it tasted!
Left overs can be re-frigerated and re-heated for up to a week. While it takes a while to assemble and bake it is worth it and yields a meal for 4 to 6 or leftovers if it just you. And is a balance of all the food groups!

Happy Eating!


If you hadn't noticed the pictures in this post are much better than previous posts. That is mostly due to using ESFSW's newest toy to take the pictures and not my tablet. 


Friday, April 6, 2012

Stuffed Bell Peppers

I remember my mom making stuff bell peppers when I was a kid. I always loved that it seemed to be the perfect combination especially on rainy winter nights. I have never been able to exactly replicate what I remember my mom doing, although I haven't actually ever inquired. But over the past 10 years I have definitely experimented a little bit. Like most things I make they change a bit every time because I don't keep exact track of my movements if it is not completely necessary. 

Several weeks ago Sprouts two weeks in a row seemed to have yellow and orange bell peppers on sale! Two for $1 which is incredible! Because I can't seem to pass up a sale of vegetables like that I found myself with more peppers than I was going to eat on their own. I had a lovely brain storm to make stuff peppers! ESFSW helped me with this endeavor and gets the credits for the photos! Please don't just we are working in sub-prime conditions and this project is on top of both of our full time jobs. The food we create we are also planning to be our dinner so the main purpose is to make dinner, secondary purpose is to provide blog posts! I hope in the future our photography will get more professional looking. But for now it is merely to be pictorially descriptive!

Here is what I used:

Peppers - red, orange or yellow (green work too but I like the flavor of these better)
Ground meat - I used pork sausage for its flavor
Garlic
Onion
Olive Oil
Stewed Tomatoes (canned)
Tomato sauce (canned)
Rice - I used Trader Joe's Brown Rice medley with Rice, black barley and Dikon Radish seeds
Red Pepper flakes
Worcestershire Sauce
Tabasco Sauce
Cheese - I used Herb Goat Cheese


Most of the Ingredients used! I forgot a few when I took the picture.


Here is what I did:

Chop the onion (1 small one or 1/2 a large one). 


Peel 4 cloves of garlic. I don't particularly mind the smell of garlic on my hands it is so much better than the smell of gloves from laboratory work or chemical smell (and yes I am very diligent in washing my hands in lab and when I cook!). If peeling garlic cloves are the bane of your existence then here is a tip for you. Take a clove of garlic and place it on a cutting board. Take a large knife like the one pictured with the onion in the picture above. Put the flat part of the blade over the garlic clove and with the heel of your hand smash the garlic clove using the broad side of the blade.

Smashing a garlic clove.
Once smashed the paper skin will peel off much easier!

Presto! Garlic peeled in 2 easy steps!

In a medium fry pan, heat olive oil over medium high heat. Taking the garlic mince garlic directly into the fry pan.

Olive oil heating

Let garlic simmer 1 to 2 minutes, then add onions and cook til the onions are starting to soften.

Garlic simmering - breath in the aroma!
While the garlic and onion are cooking put a pot of water on the stove and bring to a boil. Depending on the size of the pot, drop peppers into the boiling water and par boil for 10 minutes. This step softens the peppers so it doesn't take as long to bake the peppers before they soften in the oven. Many of my early attempts ended with me looking sadly into the oven after the peppers had baked for an hour with the peppers still pretty crunchy!

I should have used a bigger pot! I had to boil each individually.

While the peppers are boiling the onions and garlic should be done and it is time to add the sausage.


I don't particularily like handling raw meat so I just drop the whole thing in the pan and then break it apart as it cooks with a spoon.


Both me and ESFSW like a little heat to our food so I added some red pepper flakes (just like the ones you get with pizza) to the meat as it cooked. If you don't like spice, you can leave this out. Although I would encourage you to try just adding a bit. A little heat can help bring out the flavors in foods.


Once the meat is completely browned, remove from heat


And back to the peppers! If you are starting to feel like there are a lot of steps, their are! If you are a good multi-tasker it isn't too bad, or if you have a good assistant the process is pretty easy. The hardest thing in cooking things that have multiple steps is the timing of everything and using the waiting time to work on other steps.

So the peppers - doing this next step immediately after they were removed from boiling water will cause small finger burns! Please let the peppers cool down a little bit before handling. Next they need to be de-seeded. What I do is take a small sharp knife and cut a circle around the green stem. Then pull on the step and seeds should come out easily. Any loose seeds in the bottom of the pepper can be dumped out.


This time around I decided to cut the peppers in half, but they can be stuffed whole as well. I cut the peppers the long way and arranged into an baking dish.


Now in a large bowl, combine the cooked meat, drained diced tomatoes and the cooked rice medley (I cooked this the night before). If you tasted the meat and want more spice feel free to add some more spice at this step.


Now evenly divide the meat and rice mixture and spoon into the bell pepper halves.


Now for the sauce! Pour the can of tomato sauce into a small bowl and stir in a dash of both Worcestershire sauce and Tabasco. This just give a little bit more complexity to tomato sauce which quite frankly is pretty bland in my opinion. The Tabasco beyond adding some heat also cuts the sweetness of both cooked peppers as well as canned tomato sauce due to the high vinegar content.


After mixing, pour the sauce evenly over the peppers.


Drop large chunks of goat cheese on top each pepper. If using cheddar or some harder cheese wait to top the peppers with it until half way through baking. Place the peppers in a pre-heated 400 F oven and bake for 30 minutes. (Add shredded cheese after 15 minutes and bake til cheese is melted and bubbling)

And here is my final product! Aren't they beautiful. If you want a more toasted top, after you bake them turn on the broiler to low and cook for 2-5 minutes. Watch them carefully so you don't burn them!


ESFSW and I between use ate 3 halves of the peppers and the rest were consumed as leftovers through out the week. We had them on their own because we weren't super hungry, but they can be served with a nice green salad if you need more to eat! Although we did enjoy them with a nice bottle of wine white acquired from the local Trader Joes.


As with most of my cooking, feel free to experiment and deviate from the recipe above. My goal is to provide general guidelines for preparing delicious food, but I want to encourage you putting your own flare on your dishes! I would also like to note that these truly are an balanced meal in and of themselves. Balance of protien, vegetables and grains with a little cheese to boot! I haven't tried to make these vegetarian, but if you are one you could probably subsitute beans for the meat with relative ease. Or just use a rice and lentil mixture. If you frown on rice due to its lower nutritional value feel free to use a more nutrious grain like quinoa.

Bon Appetit and Happy Cooking!

Friday, March 30, 2012

Creamy Tomato Basil Soup


Tomato soup is one of those foods that I think is stamped in the American food vernacular. Often served with grilled cheese sandwiches as the meal to comfort and warm. I personally have not made a whole lot of strictly tomato soup. Tomato tends to be the base of a lot of my soups but never the main ingredient. I poked around online a bit looking at recipes and didn't really settle on any particular one, but took parts that I like from several and combined them with my own personal flourish!


Before you embark on this cooking journey, I will warn you that this soup will take a while to make. It is not a throw together, heat to a boil, and serve immediately soup. There are two long steps in this process, which can luckily be divided over the course of a day or two days. The soup will be best the longer it simmers. This allows the flavors of the ingredients to meld and intensify! It will be worth the wait I promise you!

Most of the needed ingredients

Here is what I used:

1 lb fresh grape tomatoes (if you have older ones that are getting wrinkly here's how to use them!)
garlic (at least 6 cloves)
olive oil 
dried basil (1 - 2 Tbs) - yes I mean the dried variety - fresh dried basil will provide the best flavor
30 oz canned diced tomatoes
1 to 2 yams or sweet potatoes depending on size (already cooked and soft)
1 tbs red pepper flakes
salt to taste
2 cups chicken stock - if you are vegetarian or vegan you can substitute with vegetable stock or water
1/2 & 1/2 - if you are dairy intolerant or vegan you can skip this ingredient.

This is what I did:

Pre-heat your oven to 425 F. 

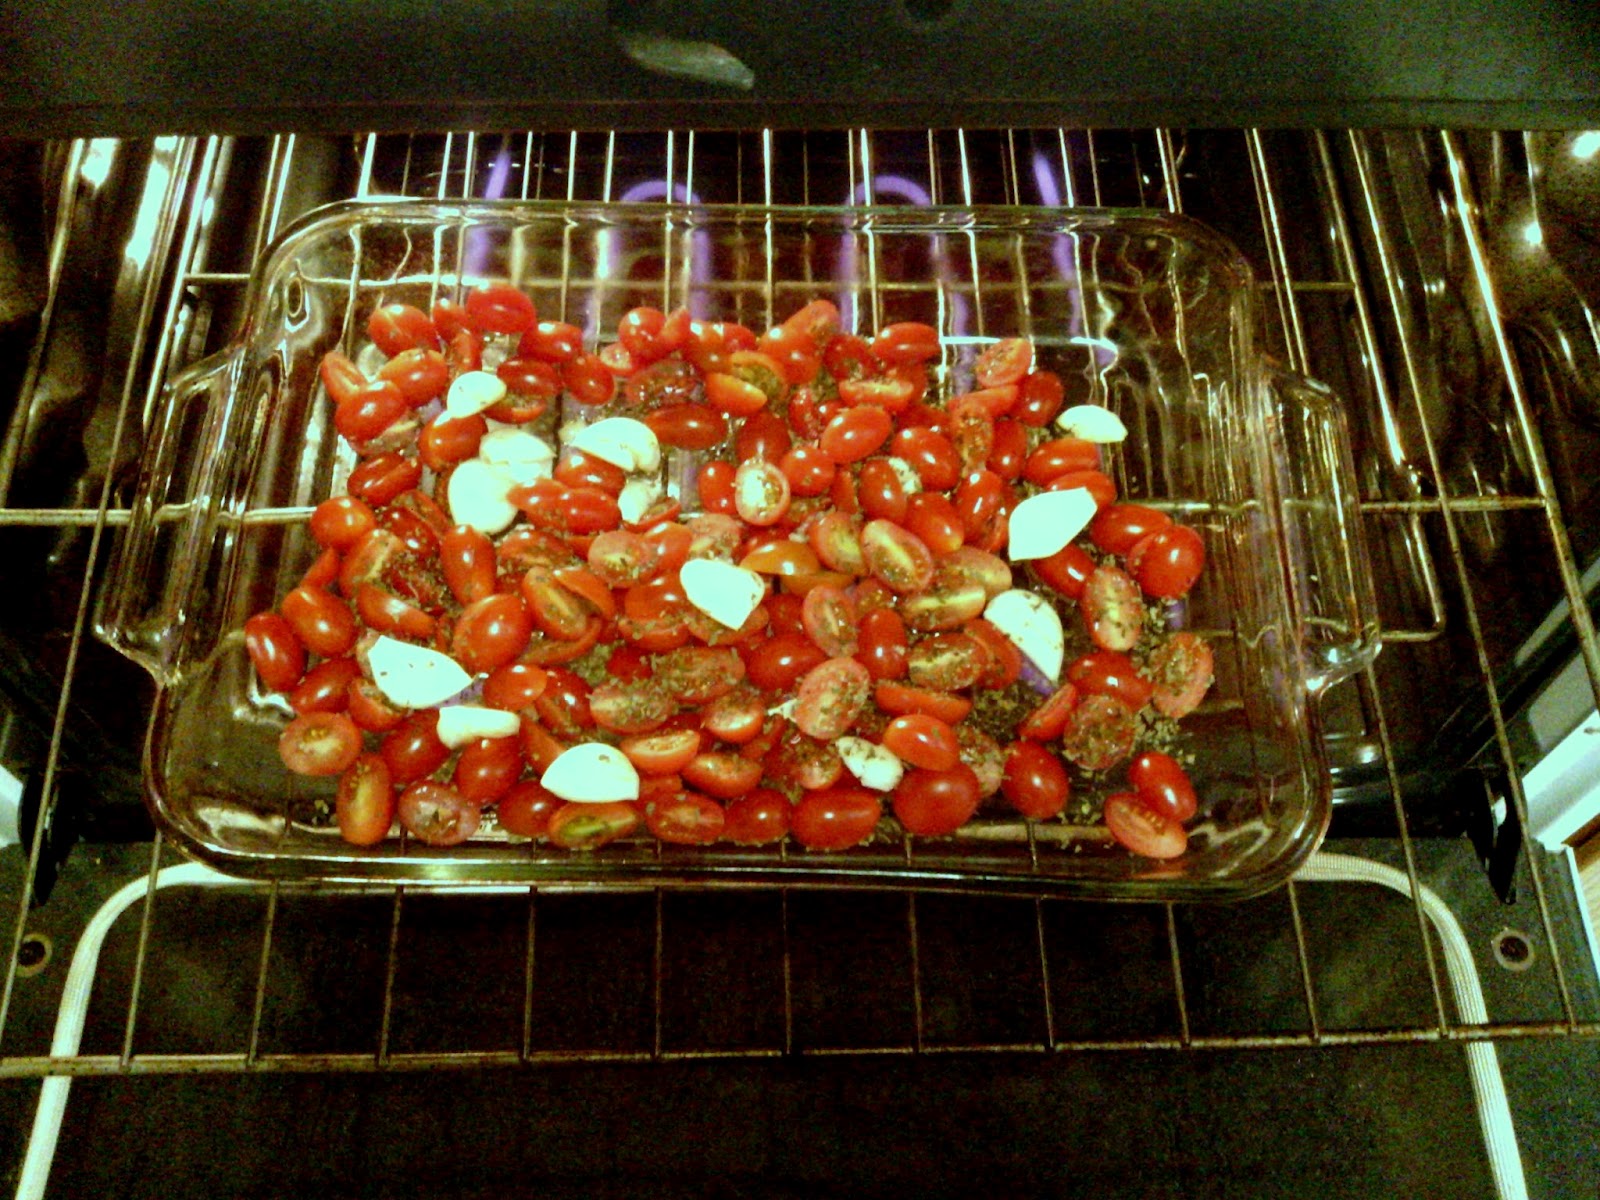
While the oven is heating, cut grape tomatoes in half and place in large baking dish (for easier clean up, line with foil). Crush several cloves of garlic and toss in with the tomatoes (I used 10 to 12 but some of them were rather small). Drizzle with olive oil, sprinkle with salt and douse with dried basil.

Place pan in oven and roast tomatoes for 30 to 40 minutes.

Tomatoes and garlic entering the oven
Toss occasionally while roasting and remove from oven once some of them are starting to char. Let pan cool. If you are doing this step ahead of time (up to 5 days ahead would probably be fine, longer if you plan on freezing them, although things do tend to lose their flavor in the freezer over time). If these are roasted ahead of time, store in a air tight container in the refrigerator. Make sure you save as much of the liquid and scrapings as possible for this is where a lot of the flavor is be found.

Roasted Tomatoes just out of the oven...mmmm they smell good!

Next in a large pot heat some olive oil. Once warm add diced onion and saute until translucent and soft. The longer you saute the onions the better. If you want even more garlic flavor you could add some minced fresh garlic at this point.

Onions starting to cook

Once the onions have started to soften, add cooked yams. I had two small yams in the freezer left over from Thanksgiving! I had been wondering what to do with them and figured this would be a good use for them since they wouldn't be that good re-heated and eaten on their own.

Add the yams

Smash the yam up with a spoon. Add more olive oil if the mixture is getting dry or sticking to the bottom of the pan. Make sure the stove is on high, but not too high that it starts to burn. Add some dried basil and the 1 tsp red pepper flakes. Let the onions and yam combine and start to meld with the basil and pepper. For anyone who might be shy of spicy foods let me put your mind at rest. The red pepper flake will not add that much heat, but will give the tiniest hint of spice and bring out some of the other flavors.

Smash up the yam

Next add the canned diced tomatoes. I used half regular and half fire roasted. Stir to combine all the ingredients.


Pour in the chicken stock. Add the roasted tomatoes and garlic and the remainder of the dried basil.


Turn down the heat to low/ medium low at this point to let the entire thing simmer for about 20 to 30 minutes. This allows the flavors to mix and intensify as some of the liquid cooks off. Give the soup a taste and add more basil or salt to taste. Be careful with the salt because as you let the soup cook it will get saltier.

Once the soup has simmered for a while pull out the immersion blender and blend. If you don't have an immersion blender (in picture) then you can use a regular blender and blend batches of the soup. Make sure if you use a regular blender to be careful. Blending hot liquids can lead to explosions so let steam escape as you blend!

Blending the soup - keep the end fully immersed or else soup will splatter up towards you!

Depending on your time constraints let the soup simmer for another 20 to 30 minutes. Now comes and optional part! If you want your soup extra creamy you can had half and half or heavy cream (using anything else will make the soup too watery, if you want to avoid the fat just skip this step). I was planning on freezing half the soup so I removed the portion I wanted to freeze before adding the dairy product. I have never found dairy based soups freeze and thaw very well. 

Half and Half

Stir in Half and Half
 Serve with toast or cheese and sprinkle basil on top!


 I thought the soup was excellent! I may in the future tweak the recipe a little, but nothing major. If you don't have yams you could also use carrots - about 4. You would cook these with the onions. Here you would not  add the diced tomatoes until the carrots are soft. Or you could roast the carrots ahead of time (or at the same time as the tomatoes, but in a separate pan). I hope you enjoy!

Monday, March 26, 2012

Blushing tomatoes!

I am not a vegetarian, I like a variety of meats entirely too much to give it up. I do however have a pretty high need for fresh vegetables. Spring, Summer and the warmer parts of Fall I eat salads for lunch and dinner. These are not wimpy salads mind you, and occasionally can be adorn with shrimp, tuna, chicken, ham or steak (only if there was left overs!). I actually find if I am not getting enough vegetables I start to get cranky towards the end of the week. Mostly I think because on the inside I am not feeling the greatest. Now combine a need for vegetables with a very frugal grocery shopper and mix in a little I never make shopping lists and there can be some times when I over buy vegetables and they don't get eaten before they start losing the appeal. I really hate wasting food in this way so I try to find ways to salvage what  I can. If vegetables are too far gone they definitely can still be added to soups (please don't add moldy or fully rotten vegetables to food those do need to be thrown away). If they are getting a bit more scary they can be trimmed and thrown in a pot and turned into vegetable stock. There are some vegetables though that don't work in making stock. Tomatoes are one of these items. Now larger tomatoes I flash cook in boiling water and freeze. Then when making pasta sauce or something else I can toss them in. This however is not the best way of salvaging grape or cherry tomatoes! Stumbling through one of my Nigella cookbooks I happened upon a wonderful recipe called Moonblush Tomatoes. They are softer than sun dried tomatoes and in my opinion much tastier!

fresh grape tomatoes
 
Wrinkly tomatoes that need salvaging!

Nigella's Moon Blushed Tomatoes
I tried the recipe for the first time at least 5  years ago and fell in love. And since I view having tomatoes a staple in my kitchen (at least while I am in Sunshine Ville!). I, of course being the recipe tweak-er, owning primarily from being too impatient to follow directions exactly and often being too lazy to go get the appropriate ingredients (although for these all ingredients should already be in your kitchen!), have never made these the same way twice, but have loved them each iteration. owning primarily from being too impatient to follow directions exactly and often being too lazy to go get the appropriate ingredients (although for these all ingredients should already be in your kitchen!).

Here's what you do:

Preheat oven to 450 F (make sure the oven gets fully to 450 F!)

Cut tomatoes in half and set them cut side up in a oven proof dish (I to reduce clean up will line the dish with foil)

Drizzle olive oil (2 Tbs), Kosher salt (2 tsp), dried thyme (1 tsp) and sugar (1/4 tsp) on the tomatoes.

Put tomatoes in the oven and turn it off. Leave tomatoes in the oven overnight without opening it (if you need to peak please do it through the little window!)

And here are some of my tweaks!

Oven temp: If I want them more dehydrated I actually heat the oven to 500 F (instead of 450 F).

Cutting the Tomatoes: I have cut them both the short and long way, cutting them the long way makes it easier for them to stand up in the baking dish. However it also means that some of the seed gloop may not dry out as much in the oven

Leave out the sugar - I haven't tried them with the sugar and so maybe I am missing something, but I am not sure what the purpose of the sugar is and I don't like things sweet.

Additions: sprinkling garlic salt on them or fresh ground pepper adds some additional flavor. Add what ever herbs and spices you tastes desire. My next tweak will be drizzling them with Balsamic Vinegar!

Larger tomatoes - so I have tried tweaking the entire recipe for larger variety tomatoes but with limited success. The problem lies in trying to dry the tomatoes out in the oven (not about to go buy a dehydrator which would do the trick I know!). If I do happen upon a solution I will be sure to let you all know.

~
Use these blushing tomatoes on pizza, in salads, on top of tomato soup, in other soups, in quiches, in omelettes, in lasagna, with pasta, with cheese and crackers or basil or just eat them plain. They are amazing and a great way to avoid throwing away food!