Friday, March 30, 2012

Creamy Tomato Basil Soup


Tomato soup is one of those foods that I think is stamped in the American food vernacular. Often served with grilled cheese sandwiches as the meal to comfort and warm. I personally have not made a whole lot of strictly tomato soup. Tomato tends to be the base of a lot of my soups but never the main ingredient. I poked around online a bit looking at recipes and didn't really settle on any particular one, but took parts that I like from several and combined them with my own personal flourish!


Before you embark on this cooking journey, I will warn you that this soup will take a while to make. It is not a throw together, heat to a boil, and serve immediately soup. There are two long steps in this process, which can luckily be divided over the course of a day or two days. The soup will be best the longer it simmers. This allows the flavors of the ingredients to meld and intensify! It will be worth the wait I promise you!

Most of the needed ingredients

Here is what I used:

1 lb fresh grape tomatoes (if you have older ones that are getting wrinkly here's how to use them!)
garlic (at least 6 cloves)
olive oil 
dried basil (1 - 2 Tbs) - yes I mean the dried variety - fresh dried basil will provide the best flavor
30 oz canned diced tomatoes
1 to 2 yams or sweet potatoes depending on size (already cooked and soft)
1 tbs red pepper flakes
salt to taste
2 cups chicken stock - if you are vegetarian or vegan you can substitute with vegetable stock or water
1/2 & 1/2 - if you are dairy intolerant or vegan you can skip this ingredient.

This is what I did:

Pre-heat your oven to 425 F. 

While the oven is heating, cut grape tomatoes in half and place in large baking dish (for easier clean up, line with foil). Crush several cloves of garlic and toss in with the tomatoes (I used 10 to 12 but some of them were rather small). Drizzle with olive oil, sprinkle with salt and douse with dried basil.

Place pan in oven and roast tomatoes for 30 to 40 minutes.

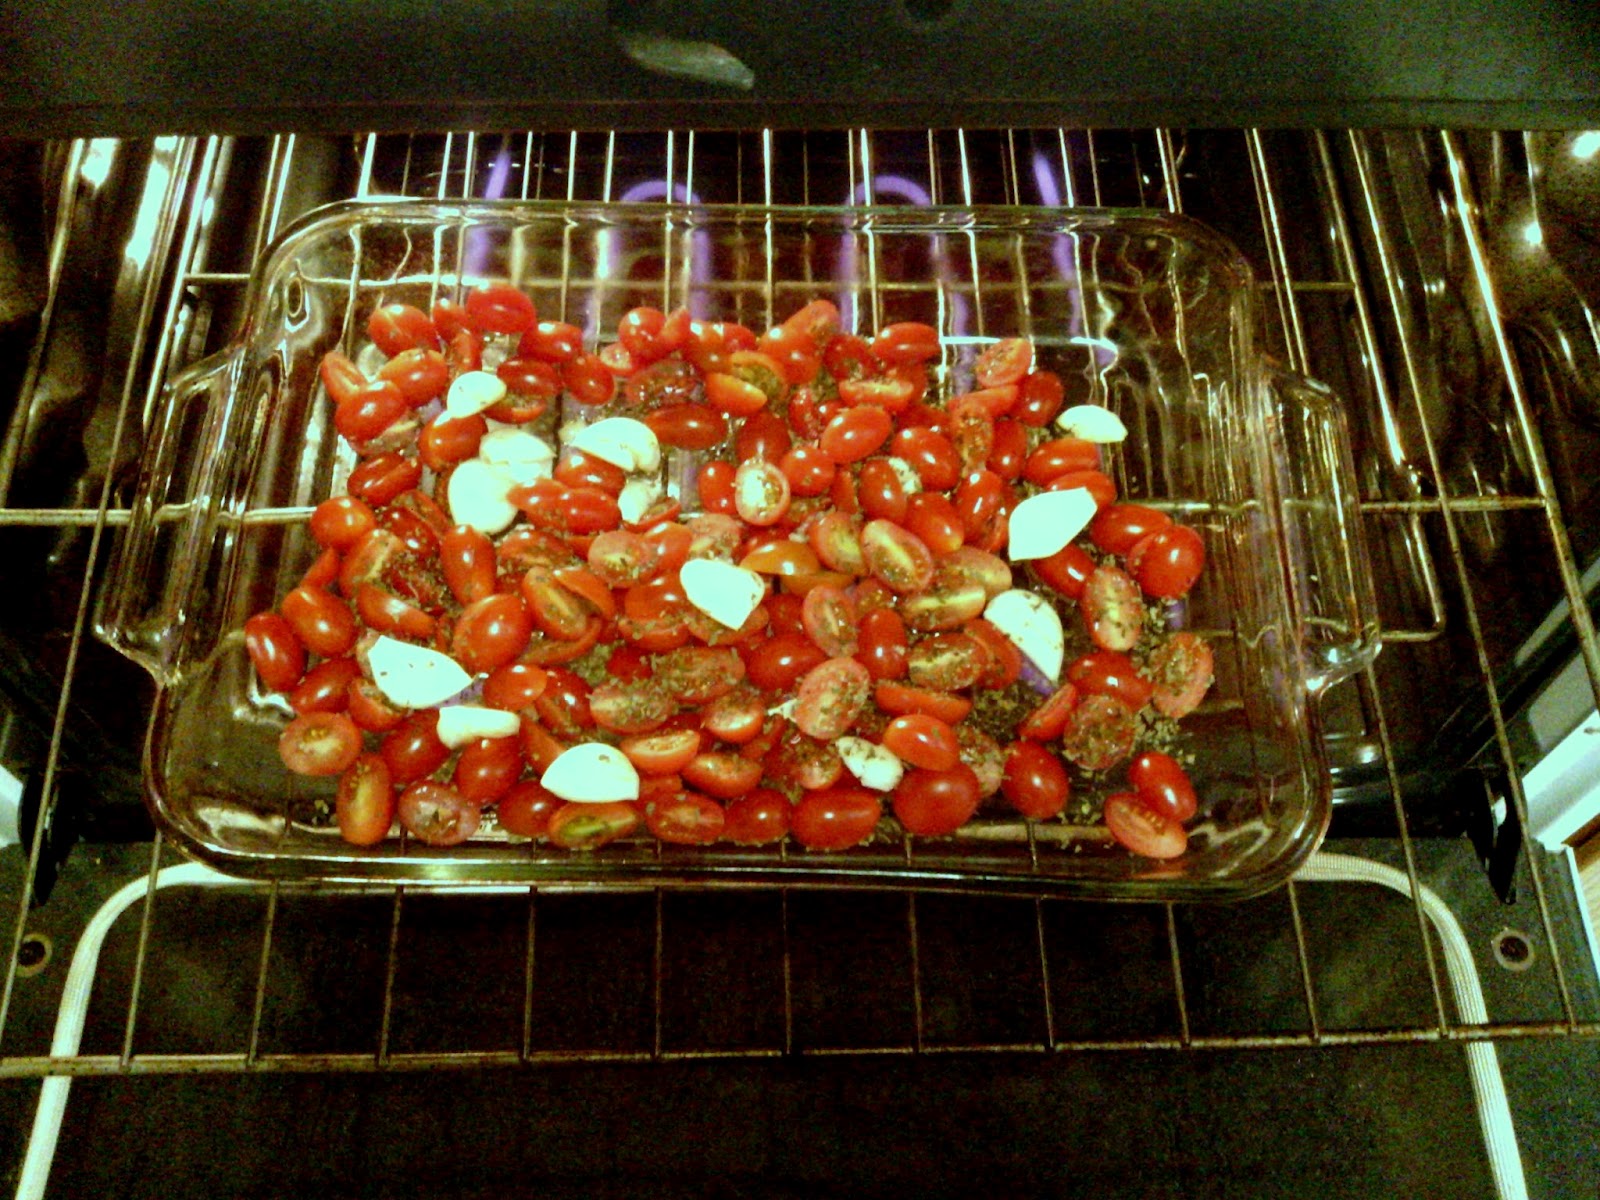
Tomatoes and garlic entering the oven
Toss occasionally while roasting and remove from oven once some of them are starting to char. Let pan cool. If you are doing this step ahead of time (up to 5 days ahead would probably be fine, longer if you plan on freezing them, although things do tend to lose their flavor in the freezer over time). If these are roasted ahead of time, store in a air tight container in the refrigerator. Make sure you save as much of the liquid and scrapings as possible for this is where a lot of the flavor is be found.

Roasted Tomatoes just out of the oven...mmmm they smell good!

Next in a large pot heat some olive oil. Once warm add diced onion and saute until translucent and soft. The longer you saute the onions the better. If you want even more garlic flavor you could add some minced fresh garlic at this point.

Onions starting to cook

Once the onions have started to soften, add cooked yams. I had two small yams in the freezer left over from Thanksgiving! I had been wondering what to do with them and figured this would be a good use for them since they wouldn't be that good re-heated and eaten on their own.

Add the yams

Smash the yam up with a spoon. Add more olive oil if the mixture is getting dry or sticking to the bottom of the pan. Make sure the stove is on high, but not too high that it starts to burn. Add some dried basil and the 1 tsp red pepper flakes. Let the onions and yam combine and start to meld with the basil and pepper. For anyone who might be shy of spicy foods let me put your mind at rest. The red pepper flake will not add that much heat, but will give the tiniest hint of spice and bring out some of the other flavors.

Smash up the yam

Next add the canned diced tomatoes. I used half regular and half fire roasted. Stir to combine all the ingredients.


Pour in the chicken stock. Add the roasted tomatoes and garlic and the remainder of the dried basil.


Turn down the heat to low/ medium low at this point to let the entire thing simmer for about 20 to 30 minutes. This allows the flavors to mix and intensify as some of the liquid cooks off. Give the soup a taste and add more basil or salt to taste. Be careful with the salt because as you let the soup cook it will get saltier.

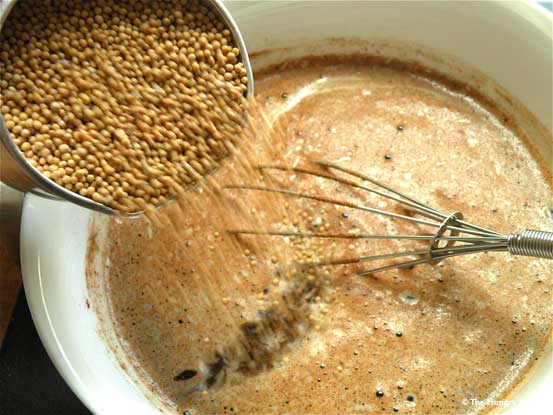
Once the soup has simmered for a while pull out the immersion blender and blend. If you don't have an immersion blender (in picture) then you can use a regular blender and blend batches of the soup. Make sure if you use a regular blender to be careful. Blending hot liquids can lead to explosions so let steam escape as you blend!

Blending the soup - keep the end fully immersed or else soup will splatter up towards you!

Depending on your time constraints let the soup simmer for another 20 to 30 minutes. Now comes and optional part! If you want your soup extra creamy you can had half and half or heavy cream (using anything else will make the soup too watery, if you want to avoid the fat just skip this step). I was planning on freezing half the soup so I removed the portion I wanted to freeze before adding the dairy product. I have never found dairy based soups freeze and thaw very well. 

Half and Half

Stir in Half and Half
 Serve with toast or cheese and sprinkle basil on top!


 I thought the soup was excellent! I may in the future tweak the recipe a little, but nothing major. If you don't have yams you could also use carrots - about 4. You would cook these with the onions. Here you would not  add the diced tomatoes until the carrots are soft. Or you could roast the carrots ahead of time (or at the same time as the tomatoes, but in a separate pan). I hope you enjoy!

Thursday, March 29, 2012

Omelette Night Try 1!


There are nights when the only thing that sounds appetizing is breakfast foods! I am not snobby I have no problem eating breakfast any time of day. I do however do have issues eating non-breakfasty foods in the morning. Luckily ESFSW also enjoys breakfast for dinner and omelettes. He actually makes them quite frequently for himself. I haven't tasted any of his yet but he promises to make one for me soon! 

Omelettes are not tricky to make, although it did take me a while to find the patience to let the egg cook before I accidentally just turned my omelette into a scramble! I also learned that it is best to use slightly cooked vegetables and always use cooked tomatoes or else the whole thing gets watery! Ewwww!

The omelette I made this night was asparagus, blushing tomato and goat cheese! I also made hash browns, but I haven't been too successful in that endeavor so I didn't take a picture of those.

And here is what I did:

Ingredients:
2 eggs (per omelette)
1/8 onion - diced and saute in butter
3-4 asparagus stocks (cut into thirds and lightly steamed)
blushing tomatoes
herb goat cheese
Salt and pepper to taste
butter

Beat two eggs in a bowl. Heat frying pan and melt butter. Heat on medium high heat (adjust as needed). Once butter has fully melted, tilt pan to make sure it coats the entire surface. Pour egg into the pan. Add onions on top the egg. Let the eggs cook undisturbed when you start to see the edges firm up add other ingredients to one side of the pan. Let eggs continue to cook. Gently with a spatula fold the egg only side over the other ingredients. Let it cook til the egg sets. You can actually turn off the heat at this point. 

Now the tricky part! Take a plate and with a sure and quick movement turn the frying pan over flipping the omelette onto the plate. Now I usually would eat mine with some mixed salad greens, but hash browns also are tasty!


My Omelette!


Wednesday, March 28, 2012

I think I am in LOVE!

My new love!

I think I need to inform ESFSW that I have fallen in love with a range and oven by La Cornue. I already showed him an example of this beautiful piece of eye candy at the Williams Sonoma in Sunshineville. He knew the minute I said I wanted to show him something super pretty, that it was probably something for the kitchen. This particular model has double dome ovens and a customizable cook top which can have gas, electric, gas lava rock grill (induction is on its way!). This one is probably more than I would actually ever need, there are some pretty cool smaller models. ESFSW agreed it was a pretty cool kitchen super tool. Did I mention you can chose your color enamel and metal trim?!? And you can have a whole kitchen that coordinates. I will have to wait quiet a while until this dream could become a reality, but for now I can dream and take donations! 

And examples of other things I love: 


Monday, March 26, 2012

Blushing tomatoes!

I am not a vegetarian, I like a variety of meats entirely too much to give it up. I do however have a pretty high need for fresh vegetables. Spring, Summer and the warmer parts of Fall I eat salads for lunch and dinner. These are not wimpy salads mind you, and occasionally can be adorn with shrimp, tuna, chicken, ham or steak (only if there was left overs!). I actually find if I am not getting enough vegetables I start to get cranky towards the end of the week. Mostly I think because on the inside I am not feeling the greatest. Now combine a need for vegetables with a very frugal grocery shopper and mix in a little I never make shopping lists and there can be some times when I over buy vegetables and they don't get eaten before they start losing the appeal. I really hate wasting food in this way so I try to find ways to salvage what  I can. If vegetables are too far gone they definitely can still be added to soups (please don't add moldy or fully rotten vegetables to food those do need to be thrown away). If they are getting a bit more scary they can be trimmed and thrown in a pot and turned into vegetable stock. There are some vegetables though that don't work in making stock. Tomatoes are one of these items. Now larger tomatoes I flash cook in boiling water and freeze. Then when making pasta sauce or something else I can toss them in. This however is not the best way of salvaging grape or cherry tomatoes! Stumbling through one of my Nigella cookbooks I happened upon a wonderful recipe called Moonblush Tomatoes. They are softer than sun dried tomatoes and in my opinion much tastier!

fresh grape tomatoes
 
Wrinkly tomatoes that need salvaging!

Nigella's Moon Blushed Tomatoes
I tried the recipe for the first time at least 5  years ago and fell in love. And since I view having tomatoes a staple in my kitchen (at least while I am in Sunshine Ville!). I, of course being the recipe tweak-er, owning primarily from being too impatient to follow directions exactly and often being too lazy to go get the appropriate ingredients (although for these all ingredients should already be in your kitchen!), have never made these the same way twice, but have loved them each iteration. owning primarily from being too impatient to follow directions exactly and often being too lazy to go get the appropriate ingredients (although for these all ingredients should already be in your kitchen!).

Here's what you do:

Preheat oven to 450 F (make sure the oven gets fully to 450 F!)

Cut tomatoes in half and set them cut side up in a oven proof dish (I to reduce clean up will line the dish with foil)

Drizzle olive oil (2 Tbs), Kosher salt (2 tsp), dried thyme (1 tsp) and sugar (1/4 tsp) on the tomatoes.

Put tomatoes in the oven and turn it off. Leave tomatoes in the oven overnight without opening it (if you need to peak please do it through the little window!)

And here are some of my tweaks!

Oven temp: If I want them more dehydrated I actually heat the oven to 500 F (instead of 450 F).

Cutting the Tomatoes: I have cut them both the short and long way, cutting them the long way makes it easier for them to stand up in the baking dish. However it also means that some of the seed gloop may not dry out as much in the oven

Leave out the sugar - I haven't tried them with the sugar and so maybe I am missing something, but I am not sure what the purpose of the sugar is and I don't like things sweet.

Additions: sprinkling garlic salt on them or fresh ground pepper adds some additional flavor. Add what ever herbs and spices you tastes desire. My next tweak will be drizzling them with Balsamic Vinegar!

Larger tomatoes - so I have tried tweaking the entire recipe for larger variety tomatoes but with limited success. The problem lies in trying to dry the tomatoes out in the oven (not about to go buy a dehydrator which would do the trick I know!). If I do happen upon a solution I will be sure to let you all know.

~
Use these blushing tomatoes on pizza, in salads, on top of tomato soup, in other soups, in quiches, in omelettes, in lasagna, with pasta, with cheese and crackers or basil or just eat them plain. They are amazing and a great way to avoid throwing away food!


Sunday, March 25, 2012

As promised...Hot Chocolaty Goodness


Hot chocolaty goodness (Aka Molten Chocolate Cakes) deserves its own post, so here it is. I teased at the end of my Valentine's post of this dessert and your wait will be worth it. Not only is this recipe incredibly easy to whip up, it is also sinfully delicious. Well that is if you like chocolate...wait are there people who DON'T like chocolate?

Nigella Lawson's Molten Chocolate Cakes
 

Once again this recipe hails from the awesome and amazing Nigella Lawson! I warned you I like her! I've made this once before for a friend's bachelorette gathering, but decided it was the best option for a Valentine's Day dessert, for a couple reasons. First, it is chocolate, second it is possible to whip up the batter/pudding before hand and bake it when you are ready and third it bakes super fast. And then there is the part about them be delicious and coming in cute little individual size portions!

There is not much to the recipe which you can find on Nigella's website. I will warn you that the recipe gives the weight of required ingredient instead of the usual measurements in cups, but the only real cup measurement is that 150 grams of sugar is roughly 1/2 cup. I know it may not seem like a lot of sugar but I swear it is enough. Depending on your sweet tooth you could probably leave the sugar out especially if using semi-sweet or milk chocolate chips since these are sweeten. If you decide on bakers unsweetened chocolate because that is what is on hand - you will definitely need the sugar and may need extra. I however have not experimented with this so I am not so sure what the optimal amount would be.
Deep-dish Ramekins
6-muffin Pan
 
The first time I made this recipe I did not have ramekins so instead used a 6 - muffin pan. This worked really well because it in my opinion is the perfect size for these. The problem is I didn't adjust the baking time enough so they were more cake-like and less gooey. This time due to my roommates having lots of dishes I had two ramekins that I borrowed. This however in my opinion made a dessert which was entirely too big to eat for one person. But it worked out that ESFSW and I shared one (leaving him one to take to work the next day) with a spring of mint on top and whiskey on the side, which made for an nice intimate Valentine's dessert. I swear we watched a movie that night but for the life of me can't remember what it was!


Thursday, March 8, 2012

Chicken soup (For when an apple a day does work!)

I just recently came down with a cold, so what else would you eat when afflicted by a cold? Chicken soup of course! I personally, despite being  under the weather would much rather make my own soup over heating canned soup (despite it taking a lot less energy). First, I can add more chicken and vegetables in the soup. Second, I also know how much sodium is in the soup and finally it just tastes better. I make soups frequently but rarely follow a recipe. This approach can back fire when trying to make cream based soups. So for me soup making tends to be a "let's clean out the fridge and see what might go together" type of cooking activity. This I warn you can be rather a risky business. I have definitely made some soups that I don't like. Chicken soup is pretty basic, and can be quite cost effective considering how many meals you get out of a pot compared to a can of soup!


Here is what I did:

2 poblano chilies (roasted in the oven, skinned, de-seeded and chopped up)
1 diced onion
3 minced cloves of garlic
5 celery stalks chopped
6 chopped carrots
1/3 cup wild rice
2/3 cup Trader Joe's Brown rice medley
2 cooked chicken breasts chopped (I boiled them)
Turmeric (helps brighten the color - naturally!) 
olive oil
chicken stock (I used 4 cups
water

Poblanos

Saute onions, garlic, celery, carrots and wild rice in olive oil and turmeric until the carrots are just starting to soften. Add brown rice medley, chicken stock and 1 cups of water. Add poblano chilies. Cook til rice is just turning tender. Add water if you need more liquid. The rice mixture will absorb some of the liquid and some will cook off. You can also just use more chicken broth if you want. Season as you wish with herbs and spices of your choice!

Brown Rice, Black Barley and Dikon Radish Seeds


I typically don't add salt until I am eating a bowl of soup. This ensures the soup does get overly salty. While most may not think of whipping up a pot of soup at a drop of a hat, I will say it really isn't that hard and can be an entire meal if you add enough stuff to the pot. Every time I make soup it comes out a little different because as stated I rarely a recipe. In my opinion it is best just to experiment. What is good to remember however is the order of when you add  ingredients. Obviously really hard vegetables and hard beans will need to cook the longest. While tender vegetables can be added at the very last minute. Also if you are going to use rice or pasta best to for the first time have it al dente, because every time you re-heat the soup it will soften. I froze half the pot to keep it fresh, but ended up defrosting it two days later. I got about 10 meals out of the pot.


Tuesday, March 6, 2012

A Valentine's Day In

I am not a huge Valentine's day fan but, it is still nice to take the time to prepare a nice meal. ESFSW and I had gone to Stone Brewery for dinner the Saturday Valentine's Day as our night out. It was a great end to a nice day spent in Fallbrook. The meal as always was delicious (despite ESFSW not being able to get the sausage sampler) and the beer sublime like usual (mostly because they had some of our favorites! Russian Imperial Stouts how we love indulging in your dark malty complex and intense flavors!) But, enough about Stone for now...there will be a separate post on them anyways in the days to come. Valentine's day fell on a Tuesday this year and as I have a standing tutoring appointment that night ESFSW and I decided to postpone our Valentine's day for the following day and we would eat in. I was in charge of everything except the grilling and the table setting. We made cheddar mustard risotto, sauteed mushrooms and leeks and grilled steaks (hmmm...we seem to do those a lot judging by my posts...we don't really! I swear!).

Menu: Cheddar Mustard Risotto, Sauteed Mushrooms and Leeks and Lemon Marinaded Grilled Steaks

Rough Recipe: Cheddar Mustard Risotto (Tweaked slightly from Nigella Express Recipe)


You can access the recipe by clicking the link or picture above. My tweaks were minor and instead of recopying the recipe and potentially forgetting a step I thought I would just outline what I changed. I made sure to get Extra Sharp Tillamook Cheddar to make sure there was a good strong cheddar flavor. I have been tempted however to get some Irish cheddar and try this recipe with that (but I digress). I also used Trader Joe's vegetable stock. What is nice about this stock is it has a deep color and strong flavor which melded well with the cheese and the mustard. I did use slivered green onions although I have skipped that ingredient in the past and never missed it. The two biggest changes is the amount of mustard I added...lets say it was an overly generous squeeze out of the stone ground mustard bottle. Hey ESFSW has two bottles, why not use lots! Although I probably could have used a smidge less than I did use. Now despite being at Trader Joe's just prior to cooking dinner to buy a bottle of Zinfandel to go with dinner I did not buy wine for the risotto. So I whipped up a 1 part water, 1 part apple cider vinegar with a Tbs of sugar to replace the white wine. This does give a more intrusive flavor than a white wine would have given, but it adds to the complexity of the cheddar and mustard. While, risotto can be time consuming this recipe really isn't too bad as long as you have everything prepped and ready before you dive in. 

Rough Recipe:  Sauteed Mushrooms and Leeks

Mushrooms - trimmed and sliced
Leeks - chopped into 1/2 in thick pieces
garlic
butter

Melt butter in a fry pan add garlic and saute gentle. Add mushrooms and saute. When the mushrooms are half way cooked add the leeks and cook til they have softened but the green parts are a deep bright green. If you want a more buttery flavor drain the juice that cooks out of the mushrooms when cooking before adding the leeks. If the pan seems too dry then add more butter as you cook. Serve immediately.


Rough Recipe: Lemon Marinaded for Steaks or Chicken

1 gallon size zip-lock bag
olive oil
Lemon juice
Lemon zest
garlic (3-6 cloves, peeled and crushed)
salt
fresh ground pepper
(any other desired herbs - fresh will yield more flavor)

Combine all the ingredients in the zip-lock bag. Add meat and let marinade in the refrigerator for up to a day. Flip the meat over at least once to get both sides marinading evenly.


~
This was a pretty good joint venture for ESFSW and I. He helped a lot with shredding cheese to cutting up mushrooms and leeks for me and then of course being the Grill Master! The final result was wonderful and a whole lot less stressful compared to going out on Valentine's Day. And we felt all special lovey feelings that couples in love are suppose to experience mid-February. The wine on first sip was a bit of a disappointment but after letting it breath a bit more it opened up nicely! Good suggestion from the Trader Joe's employee - Leonhart Zinfindel.

There was also dessert, but you'll just have to wait for the recipe to hot chocolaty goodness!

Sunday, March 4, 2012

More Brussels Sprouts with White Bean Mash!

I think I have mentioned that ESFSW (my bf) have been trying to cook on Saturday evenings. It gives us a chance to cook together, enjoy a beer in the process as we prep food, relax and save a little money. If roommates are around they are welcome to join us. I enjoy cooking and it is some much better when I can do it for more than 1 person. We typically finish out the evening by playing some games or watching a movie. I know we could be hitting the town and painting it red, but honestly that is neither of our style's. And while we have made this a regular thing we don't ever mind rearrange plans to go out with friends!

Rough Recipe: Mustard Braised Brussels Sprouts (inspired from Smitten Kitchen's Dijon-Braised Brussels Sprouts)

Brussels Sprouts on their Stalks

Mustard (and no this isn't me making mustard!)


I would like to note that I am a lazy recipe follower and I didn't follow SK's recipe (linked above) directly because I didn't have heavy cream, white wine, parsley or shallots! And embarrassingly I had just been at the store and could have easily picked up these items. I had not actually looked at the recipe in great depth before my shopping trip (I also rarely make shopping lists!) I saw the title: Djion Braised Brussels Sprouts and said "Check!" Well there were actually quite a few items I needed in addition. So here is my version to the best of my memory:

Rough Recipe: Djion Braised Brussels Sprouts (inspired by Smitten Kitchen's Version)

Brussels Sprouts
Butter
Pearl onions/shallots
Stone Ground Mustard
apple cider vinegar
water
Sugar in the Raw

Clean and trim the Brussels Sprouts cut in half. Melt butter in skillet, when melted place Brussels sprouts cut side down in the butter and brown the cut side. Turn over to brown the other side. Add about a 1/4 cup apple cider vinegar with 1/4 cup water and a little bit of sugar (to tone down the strong acid taste of the vinegar), I use Sugar in the Raw, typically one package works well, aka ~ 1 Tbs. Really any sugar will do. This watered down vinegar sugar mixture is the substitute for the wine. Add thinly slice onions/shallots and mustard. It is best to stir the mustard in the liquid before adding the mustard so it is fully mixed. Now I used a generous amount of mustard, I am talking about almost an 1/8 of a cup. While I might be terrible allergic to mustard flowers I can't get enough mustard in my food however I do draw some lines. I don't do anything crazy like mustard peanut butter sandwiches...but I digress! So after adding the onions/shallots,


Rough Recipe: White Bean Mash (Tweaked from Nigella Lawson's White Bean Mash Recipe)...if you find yourself not being able to chew or want a simple white bean soup recipe check out this recipe.


Canned white beans + some of the juice (cannelli - not navy beans)
Olive oil
Lemon juice
Lemon Zest
garlic cloves

In a saute pan, dump a can or two (may want to go for the two to start off, once you taste this you won't be able to stop eating it!). Add minced garlic (I tend to add 3 to 4 large cloves personally!) and cook over medium heat until the beans are warmed through and begin to soften. Add some olive oil, lemon juice and lemon zest. I love love love lemons, so I am rather heavy handed with the lemon juice. It is best to use juice from lemons not the stuff you find in those funny plastic lemons or in a bottle, but if lemons are insanely expensive or unavailable the bottled stuff will do. As everything cooks take a spoon and mash the beans as you stir. If the whole mess starts to look a little dry add a little liquid, I recommend some of the juice the beans came in or if you dumped that add some water. Once the mess is mashed enough for your tastes it is ready to serve (unless you were too heavy handed with adding liquid - let it continue to cook off). You may need to add salt to taste to bring out the flavors. 

~
White bean mash goes with almost anything in my mind and is as tasty if not more than mashed potatoes. If you like the dish I strongly recommend you reading Nigella Lawson's write up in here cook book, Nigella Express, because it is so descriptive and sensuous. We paired it with the Djion Brussels Sprouts and grilled steaks. The meal was finished off with a good malty beer (a brown ale).

Friday, March 2, 2012

Roasted Lemony Cauliflower and Cauliflower Greens


As mentioned in my previous post I purchased a beautiful cauliflower from the local Sunshineville Farmers Market. I had plans for half of it but it was huge and I knew that I didn't need that much curried cauliflower and potatoes and I had all these cauliflower greens that where sort of wilted and needed to be cooked if I was going to eat them. Yes you can eat the Cauliflower greens! Typically you don't get the greens when you guy a cauliflower head in the grocery store. But they are a real treat and taste just like the cauliflower but they are green, which adds a bit of color to a meal that could turn completely white depending what you are pairing with the cauliflower. I also had some onions that had been soaking in lemon juice + zest for days and needed a purpose. What else would anyone do but roast all these items together!
So I cut up the cauliflower into slightly larger than manageable bites and put them in a bowl, I then took the lemon infused onions and tossed those in on top. For good measure I added some more lemon zest and juice (one can never have too much lemon in my opinion!) and several cloves of minced garlic. A decent pour of olive oil, a exuberant dash of salt, and daring addition of white pepper and a heavy handed addition of dill. Taking clean hands toss all these items so that they are well mixed and everything is coated with lemon juice and olive oil. I then poured the contents of my bowl into a foil lined baking pan and placed it in a pre-heated 450 F oven. I roasted the vegetables for 35 minutes. I wanted cauliflower to bet a nice toasted color on top and decently soft - although not mushy! I also mixed the them half way through their roasting. The bits at the bottom can't hog all the olive oil!

I ended up eating these with some fish, which in retrospect went against my rule that meals must be colorful, but it was quite tasty. The left overs I continued to eat all by themselves over the next couple days. I must say the combination was best the night they were roasted but still delicious in the following days.

Thursday, March 1, 2012

A cultural culinary OOPS! ...But it was so delicious!

Not my beautiful Cauliflower, just a picture!

I wanted to make a delicious meal for my bf, the Estimating Softballing Fishing Snake Wrangler (ESFSW). I had recently bought a beautiful cauliflower from the local Sunshineville's farmer's market and I was looking for recipes to use and I happened upon one from my current favor food blog: SK. It was also a plus that it was found under the heading Cumin Junkies! Yup I am one of those! So then what better to have with a cumin based dish but another cumin based dish, Radish and Mint Riata Salad.

Menu: Curried Cauliflower and Potatoes, Radish Mint Riata Salad and Flash Fried Steaks

Rough Recipe: Curried Cauliflower and Potatoes (Tweaked from Smitten Kitchen)

potatoes (cubed)
cauliflower (cubed)
vegetable oil (Tbs)
1 tsp cumin seeds
3/4 tsp salt
medium onion chopped
2 garlic cloves (diced or minced)
2 jalapenos (diced - include seeds)
2 tsp ground cumin
1 tsp ground corriander
1 tsp tumeric
1/2 - 1 tsp cayenne

* Note - I have at least doubled the spices. And if you want less less spice in your life (aka heat from the jalapenos), don't include the jalapeno seeds! 

1) Pre-heat the oven to 425 F. Place a baking dish in the oven (I line the dish with foil for easier clean up afterward! You can also more easily drain the infused oils and incorporate them into the dish.)

2) Toss potatoes and cauliflower with some of the vegetable oil and all of the cumin seeds. Put in the hot baking dish and roast vegetables for 20 minutes

3) While vegetables are roasting, heat more vegetable oil in a large saute pan. Cook onions, garlic and jalapenos. Once they have started to soften add the spices and the salt. Mix well to incorporate. If the mixture is looking a little dry don't be afraid to add a little more oil. Also don't forget to take a moment and breath in the aroma! (while you continue to stir! Cooking purists would say it is best to use a wooden spoon for stirring here, but personally I am not that fussy!)

4) The cauliflower and potatoes should be done roasting at this point, so add them to the saute pan. (If you don't have a large enough pan just use a large pot! It is terrible to have a pan that is too small and as you try to stir and vegetables are spilling out on to your range!) Add 1/2 cup water. Stir and then let cook for 5 minutes covered. FYI don't be afraid to lift the lid to savor the aroma or stir to make sure the bottom of the pan isn't burning. Also don't be afraid to taste and add more spices if needed. Please note that if you pull the roasting vegetables out early they will need more cooking time. The 5 minutes are more of a general guideline (much like the Pirates Code).

The final step is mixing up the Cucumber Scallion Raita!

1/4 cup English cucumber (de-seeded and chopped)
thinly sliced scallion
3/4 cup greek yogurt
1/2 tsp salt

Mix! Savor with the Cauliflower Potato dish!


Rough Recipe: Radish Mint Raita Salad (Tweaked from Sunset Magazine)

1 red onion (8 oz, aka 1 cup. or 1/2 lb) - slivered and soaked in cold water for 10 minutes
1/2 lb red radishes (trimmed and sliced thinly)
1 English cucumber (de-seeded and sliced thinly)
1 cup whole milk plain yogurt - even better! Greek yogurt
2 Tbs lemon juice (I usually double this and add in some zest because I love the lemon flavor, the additional liquid will make it more soupy so be sure the rest of the vegetables are really dry and use a really thick yogurt...like Greek!)
1 tsp cumin seeds
1 tsp ground cumin
1/2 tsp white pepper
1/2 tsp salt
1/2 cup thinly sliced mint leaves

1. Make sure the onions are well drained...I usually wring them out with a paper towel (if you are being green use a towel).

2. Toss onions, cucumber and radishes together in a bowl. Draining any pooling liquid at the bottom of the bowl.

3. Mix yogurt, lemon juice, ground cumin, cumin seeds, pepper and salt. (At this point depending on my mood I may also stir in a little...wait A LOT of ground cumin to give it that extra kick. If you are not a self-profess Cumin Junkie or you are trying to kick the habit/addiction by all means just stick to just the seeds). Toss into vegetable mixture.

4. Chill for an hour - serve with mint on top. This salad will keep for a couple days, however will get more watery with each passing day as the radish loose the crisp crunch turning limp and lifeless, much like a poorly aging "fill in blank here" (can't risk offending!)

Cumin-Mint Raita Salad Recipe


Rough Recipe: Flash Fried Steaks - See the previous post!

I didn't realize until afterward that pairing an Indian style curried dish with a steak is probably a BIG No No! But I SWEAR I was just trying to come up with a dish that was colorful. The color of cooked chicken or fish would have just blended in with the curried cauliflower and Mint Radish Raita Salad. So I chose beef...oops. I wasn't thinking! I must say though that the lemon flavor on the steak complimented the spiciness of the cauliflower dish and the radish salad. The leftovers where great as well, although the cauliflower and potatoes definitely got spicy the longer they sat in the refrigerator, which made the cucumber scallion raita essential!

PS. Stay tuned for what I did with the rest of the cauliflower including the greens!