Sunday, April 29, 2012

Strawberries and Cardamom Whipped Cream

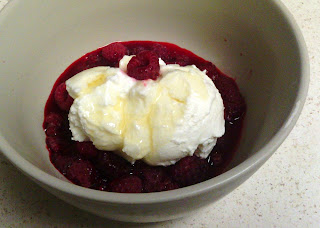
Strawberries and whipped cream is one of the delicious simple pleasures in life. Now add cardamom and it becomes heavenly! It is best to make your own whipped cream which is a lot easier than you would think and yields great results and is all natural.

Here's what I used:

Whipping Cream (1 to 2 cups)
pinch of salt
pinch of cream of tarter
1/4 to 2/3 cup powdered sugar (add based on taste)
1 to 2 tsp cardamom

Whipping Cream and Powered Sugar!

Here is what you do:

Put a metal or glass bowl in the freezer for a couple hours (add the beaters as well if you think of it). Take bowl out of the freezer, add whipping cream, salt and cream of tarter. Using a stand or hand mixer whip cream until it starts to form peaks. Add powered sugar. Continue to whip until the cream forms peaks that stand.

Unwhipped - whipping cream in cold mixing bowl

Cream is thickening add powdered sugar

Dollop generous amounts of whip cream over sliced strawberries!

Doesn't that look delicious!
If you are like me and like cardamom you can sprinkle a little on the strawberries before you top with the whipped cream.

Enjoy!

Thursday, April 26, 2012

Split Pea Soup!

What to do! What to do! I have ham in the freezer that has over stayed its welcome and the freezer decided to punish it with freezer burn! I really should have used it months before and yet I just didn't have any plans for it. But I didn't really want to toss it in the trash that is such a waste in so many different ways! Besides the solution is simple - split pea soup!

I was going to make it just for myself to have during the week, but thought why not make it on a Saturday night for ESFSW and myself to have with grilled cheese sandwiches (we still had sourdough from Boudin's to eat up). He didn't seem to excited at first, so I pried a little since usually he is all for what I have suggested to make in previously - granted I haven't suggested anything too crazy yet! Come to find out pea soup always made him feel sick when he was a kid, he theory is that he is slightly allergic to peas which is tied to his peanut allergy. I was a little skeptical til I did a little research and found that these allergies can be linked! If you want to know more about pea allergies you can check it out here:


Anyways - I kinda pushed him into trying it again since he did out grow other allergies from his youth and his peanut allergy has lessen (not to the point I could feed him one without an adverse reaction - insert sad face here - you see I am quite the fan of the lowly peanut and many things that have peanuts in them!)

Anyways on to the soup!

Here is what I used:

Vegetable Stock
2 to 3 cups dried peas (soaked in water)
1 lb bag frozen peas
1 small onion (diced)
4 celery stocks (chopped)
2 cloves garlic (minced)
1 turnip
3 carrots (chopped)
2 cups chopped cooked ham (or a ham bone if you have one on hand) - if you are vegetarian or vegan just skip!
2 tsp cumin (optional)
2 bay leaves
salt and pepper - to taste (only add salt at the very end)

Here is what I did:

The night before (or in the morning) put the dried peas and rinse them off in a strainer. Put them in a medium to large bowl and fill with water. Cover the bowl with a towel (so nothing falls in!)

Soaking Peas
In the morning the peas should have soaked up some to most of the water. If you aren't going to use the peas right away drain the water and put the peas into a ziplock bag and place in the refrigerator.

soaked peas
In a large pot - heat 2 Tbsp of olive oil. Add mince garlic onions and celery and saute until the celery is softens and the onions are translucent. Then add carrots and cumin and continue to cook until the carrots begin to soften. Now add vegetable stock and soaked peas and the bay leaves. 

*I didn't take pictures of the saute-ing process. Please forgive my over sight. But, honestly do they all start looking the same!

The soup - halfway done.
Bring the soup to a boil and then lower the heat and let the soup continue to simmer. Stir occasionally. In this step the soaked peas will basically disintegrate. 

While the soup is simmering - peel the turnip and cut into cubes. 

Peeled Turnip - I only add half because I got such a large one

Cubed turnip
Add the turnip to the soup and at the same time add the bag of frozen peas (if you leave them out while you are working on the soup they will thaw so that you don't lower the temp of the soup too much). Using the combo of frozen peas and dried peas allows the soup have the consistency of split pea soup, but also have whole peas present in the soup.

Frozen peas!

Next cut up the ham and add it to the soup. Let the soup simmer for about 20 to 30 minutes. Make sure to stir the soup from time to time.

Soup right after the ham is cooked.
Soup simmers the turnip and split peas will turn more mushy and thicken the soup.

After the soup as simmered a bit longer
Taste the soup and decide if salt and pepper if needed.

ESFSW made grilled cheese sandwiches that we ate with the soup and it was a great combo. We had lots of left over soup for us to split and have for lunches or dinners. I froze half of the leftovers so that it keeps longer.

ESFSW giving his rating of the meal!
This is a nice alternative to the super smooth strained pea soups. Heartier and full of vegetables this is a great dinner for cold nights. I hope you enjoy!

Recipe:

32 oz Vegetable Stock
2 to 3 cups dried peas (soaked in water)
1 lb bag frozen peas
1 small onion (diced)
4 celery stocks (chopped)
2 cloves garlic (minced)
1 turnip
3 carrots (chopped)
2 cups chopped cooked ham (or a ham bone if you have one on hand)
2 tsp cumin (optional)
2 bay leaves
salt and pepper - to taste (only add salt at the very end)

Soak dried peas over night in water. In a large pot - heat olive oil over medium high heat. Add minced garlic and the chopped onion and celery. Cook til both celery and onion are soft and translucent. Add carrots and cumin. Continue to saute til carrots begin to soften. Add the vegetable stock, bay leaves and split peas (soaked) bring to a boil then reduce heat and continue to let soup simmer. Add chopped up turnip and thawed frozen peas. Add ham and let soup simmer for 20 to 30 minutes. Add salt and pepper to taste. Serve hot!

Wednesday, April 25, 2012

Roasted Garbanzo Beans

I had been wandering around the interweb and happened upon recipes for roasted garbanzo beans. The recipes that I found where mostly for sweet ones but I was in the mood for something spicy!

Here is what I used:
1 can Garbanzo (chickpeas) Beans
Olive Oil
Salt
Tumeric
Curry Powder


 Here is what I did:

Open and drain can of garbanzo beans and rinse. Dry beans with towel (paper or cloth) removing any loose skins. Now in a bowl mix olive oil (~ 1/4 cup), salt and spices together (at least a 1 tsp of each - more if you want them spicier - I always play this step by ear). Toss garbanzo beans in the oil and spices to coat well.

On a baking sheet (I lined mine with foil for easier clean up) spread the beans out. Place in pre-heated 450 F oven.

Just going into the oven...don't they look excited!
They've been in there for a little bit, so I rolled them around so they wouldn't get burnt on one side!

After about 20 to 30 minutes (depending on your oven and how crispy you want them) remove and let cool. They are best right out of the oven but will keep for a couple days (if they last that long).

These ones are done, it is hard to tell from the picture but they are a tad darker

I definitely added more curry powder than intended so they were super spicy, which was fine because I had an excuse to make yogurt raita (which I would eat all by itself if I thought it was socially acceptable!). My favorite thus far as been the one on Smitten Kitchen's website (Cucumber Scallion Raita).

I think in the future I will always just use S&W Garbanzo Beans - they are my favorite because they are such high quality but I used what was on hand which was Sun Harvest from Sprouts, which are not bad but I think I can improve the quality of the finished product with starting with higher quality starting product.

This recipe definitely can be tweaked and could be used to make sweet roasted garbanzo beans using sugar and cinnamon. Play around! The kitchen is the laboratory of the home so... experiment! (hmmmm... I may have gone too far with that one!)

Recipe:
1 can Garbanzo beans (15 oz)
~ 1/4 cup Olive Oil
1 tsp salt
1 to 2 tsp of desired spices

Mix oil and spices in a bowl. Toss the beans to coat. Spread on cookie sheet and roast in a pre-heated oven at 450 F for 20 to 30 minutes.

Monday, April 23, 2012

Avocado Festival Part 2!

Last Sunday ESFSW and I plus some good friends headed to Fallbrook for the Avocado Festival! I could summarize the experience as: Where are the avocados? We had a great time but had it not been billed as an Avocado festival we wouldn't have known. It really felt like a really large vendor fair. We had a good time and enjoyed the food we did get and commented on how we could have made everything more avocado-y.

We had a good time with our friends and did find some really good food:

Free little taco sampler from a local taco shop! It was actually quite tasty!

Guacamole and chips! We just wish we had been more or that we could have found the guacamole contest

Double D BBQ! The smoked their meat in the locomotive engine.

Tri-tip sandwich with coleslaw and baked beans - everything was really good!

Avocado tamale!

Avocado with seafood!

Avocado ice cream from Cold Stone. It was surprisingly really really good!

We did a little olive oil/ vinegar tasting at one of the many vendor stands (Pastamore)

Our one purchase (beside what we ate of course!) - Saffron Fettuccine

Recycled Avocado Tree
 The Fallbrook Chamber of Commerce claims that 70,000 people attend the annual Avocado Festival and after being there I believe it!


We had a great time despite leaving wanting more avocados, although thanks to ESFSW's grandparents we went home with bags full of Fuerte Avocados and Mandarin Oranges from their trees. They also kindly allowed us to park at their house to avoid the craziness.

Overall it was nice day out with friends!

Thursday, April 12, 2012

Avocado Festival!

Avocado Festival


I just wanted to put up a little notice about an event happening in the greater Sunshineville area this weekend. That event would be the Fallbrook Avocado Festival. I have never been before but ESFSW has and he was very sad that he missed it last year. We were sitting after playing a little tennis this evening and remember that it should be coming up soon so had me look for it on the interwebs. And low and behold it is a good thing he did because it is this Sunday! (April 15th!). 

It looks like a cool event so if you are in town and like avocados you should check it out!

There is info on the Fallbrook Chamber of commerce site: Fallbrook Website

Including (click links below):

You can also check out the full program of events at this site, which gives a summary of all the info needed.

ESFSW will probably check it out. So if you can't make it be sure to look for my post about the event!


Fallbrook - North of San Diego

Just to tempt you one more time!

Breakfast....maybe....


Breakfast!

I am not a breakfast eater...I never have been. Well, let me correct that, I am not a breakfast first thing in the  morning during the week person. I actually love breakfast food. But, you see I have found that if I eat breakfast early in the morning when I first wake, 9 times out of 10 in an hour - I am starving! This feeling will continue throughout the day no matter how much I eat. I do best with just having coffee first thing and then snacking about 9 am. One of the few things that I have found to sit well on my stomach first thing in the morning and and also not lead to day long hunger is:

Greek yogurt, berries and granola!


Yogurt, Raspberries and my secret ingredient


When I was young I hated yogurt. To the point when I had to eat it because I was on anti-biotics about all I could stomach was tiny little bites and spread it around in the bowl to make it look like I had eaten more. I actually haven't started to appreciate yogurt until I lived in France for a month back in 2007. The yogurt I got there was good! I don't know how to describe it, but it was wonderful. When I got back to the US I tried similar brands and it just wasn't the same here. I have found some brands and types that I like which include Brown Cow Fruit on the Bottom and Wallaby Organic Yogurt?


What I use:

Greek Gods Plain Yogurt (it is the best in my opinion and having the plain on hand
Frozen fruit (my favorite are rasberries)
Granola (any type would work! Silvered almonds are also a great choice)
Honey OR my own Orange Syrup! (it is the by product of candying orange rind - blog to come soon!)


Here is what I do:

In a bowl pour some frozen rasberries in. If you think of this the night before you can leave them covered in the frig and they will defrost over night. If you are like me and do not think of these things ahead of time then you can microwave them to defrost them quickly. I use the lowest power setting for 40 seconds - this leaves them soft but not hot. In the past I have tried the highest power setting (default on most microwaves) for 10 to 20 seconds and some times ended up with a mix of still frozen berries next to ones that were quite warm making me let them sit for a while to let the temperature equilibrate (yes I just used that term for any of you who might doubt that I am a scientist).


Next I scoop some Greek yogurt on top the berries and then drizzle honey or  orange syrup on top.

The Orange Syrup is there however it is pretty light so you can't see it

Stir to mix up all the ingredients and top with granola and enjoy!

Mmmm it looks so good! It just needs one more thing!

Yup for me it is coffee!
 I hope you enjoy! I really like this combo and it does keep me going all morning which is a big plus. There is also a lot of benefits of eating yogurt. Choosing a granola with flax and other grains will add to the benefits and slivered almonds will add some extra protein.

Now for any of you wondering if I make my yogurt look so pretty in the morning don't worry! Normally my bowls look more like this:

Everyday breakfast!

Happy Eating!

Recipe:
6 oz plain greek yogurt
3 oz frozen fruit
1 to 2 Tbs honey or orange syrup
1/4 to 1/2 cup granola

Thaw frozen fruit add yogurt on top and mix together with the honey. Top with granola and enjoy!

Sunday, April 8, 2012

Craft and Commerce

Recently I celebrated my 30th Birthday. For reasons not really associated with the number I really was not super excited that it was once again my birthday. A friend (E) however insisted that her and I should go out for a drink and celebrate. She suggested this place on the edge of Little Italy called Craft and Commerce.

Picture grabbed from Yelp since I didn't take any!

So, the day after my birthday I headed down with two other good girl friends (N & L) to meet up with E for  dinner and drinks at Craft and Commerce. The evening was great even though on a Tuesday there was a 45 minute wait to be seated! Boy this place was popular and it didn't take us long to find out why. Let me first back up a little to state that in Downtown Sunshineville we found a parking space across the street! It was mostly excellent timing. As we pulled up someone was pulling out. I think that was one of the fastest parking searches ever! 

But, back to the evening...We got some drinks (a beer for me and a glass of wine for N) and just hung out in the bar area. Once E got there we decided to order the Fried Pickles from the bar since we were all a little hungry. We got seated a little under the quoted time and before the pickles had arrived, but the bartender said he would send the order to the table! And while I was a little skeptical they pickles arrived and we were informed that the tab that we started at the bar was transferred to the table! Excellent! All of the food on the menu sounded delicious and the smells emanating from the kitchen were tantalizing. I was torn between the fried chicken or the mussels both not terribly priced, but finally decided on the chicken since I would probably have left overs. Others got the mac n cheese and a salad. I had a bite of everything except for the salad and let's just say the food was incredible. I got a half chicken with coleslaw, potato salad and green beans. I also had enough chicken for two more meals. The Mac n Cheese was good as well! (I traded some for a chicken wing).

While normally at the quality and price of the food this would be enough to wow me and bring me back, what impressed me the most was the interesting array of cocktails crafted here. Now I am not really a cocktail person anymore. In my college years and early grad school I would get a variety of different gin or vodka drinks, but this turn into more slow drinking alcohols like a beer or a glass of wine. I would normally raise a skeptical eye to unusual cocktails that combine ingredients that maybe shouldn't be in the form of a drink, but these felt like a throw back to a different era. I probably had more drinks that I normally would have but it was my birthday! So here is what I had:

1) beer - I can't believe what I had! Something from a small brewery that was super malty!
2) McKinsey Cocktail - Irish Whiskey, Sweet Vermouth, Benedictine, Orange Bitters
3) Milano Swizzle - Gin,  Cynar, Sweet Vermouth, Lemon, Cracked Salt

It is a good thing I wasn't driving although even while slightly tipsy I gave excellent directions out of downtown and to the freeway. I will definitely be coming back and maybe next time will take some pictures of my own!

If you find yourself in Sunshineville check it out!

Friday, April 6, 2012

Omelette Night 2

Time for omelettes again! 


There was a little hiccup in ESFSW and my communication over who was actually going to be cooking the omelettes. In the end he ended up doing the omelette making although I put the salads together and cooked the sausage. It wasn't until after I had started cooking the sausage that I realized I could have made sausage patties to have with the omelettes....que sera sera!

The photos for this post were taken by myself using a tablet, so they aren't the best. In time we will work out the kinks and I will have my actual camera back.

Here's what we used:

4 Eggs (two each omelette)
Sausage (uncased, spicy breakfast sausage)
1 Avocado
Shredded cheddar cheese
salt
white pepper

Salad: Spinach, Tomatoes and Radish

Here is what we did:


Brown sausage in a small fry pan/omelette pan with a little olive oil.

Browned sausage - set aside on paper towel to soak up extra oil.

Mean while whisk four eggs together with a small amount of milk/half and half with a dash of salt and white pepper. Make sure the eggs are beaten well!

It is best if you are making multiple omelettes to have multiple pans so that who ever is enjoying the omelettes can enjoy them together! Using one pan that the sausage was browned in dump out any pooling oil. It can be poured into a second pan. Heat both the pans over medium high heat until water droplets sizzles when splashed in the pan. Pour half the egg into each pan and let the egg cook. Adjust heat as needed so that the egg cooks evenly. Using a soft spatula you can gentle nudge the egg around the pan so that the bottom and edges set well.

Once the egg is starting to set up you can add the omelette fillings that you want. We chose sausage, avocado (cubed) and cheddar cheese (grated).

Cheddar and Avocado! One of my favorite combinations!

Add fillings trying to keep it on one side of the egg

The tricky part is folding the omelette in half. This works best not to do it too soon. I've always used a hard spatula but ESFSW uses a soft one which makes turn delicate egg easier without it tearing.

Folding the omelette in half.

After the egg has been folded over let it cook a little bit more. If you have an electric range you could probably turn the burners off at this point since they remain hot. If you are lucky enough to have a gas range just turn the heat down to the lowest.

Spinach and Green Leaf Lettuce

In the mean time, prep the salad that you will serve with the omelettes and toast any bread that you decided to serve with the omelettes. I used spinach and green leaf lettuce and then added some radish and tomatoes.

ESFSW's Omelette!

ESFSW definitely pulled through despite having to deal with a different stove, different pans, a small kitchen and trying to work around another person cooking! He made wonderful omelettes despite him not be in his element! I can't wait to taste his future cooking endeavors!


Happy Eating!

Stuffed Bell Peppers

I remember my mom making stuff bell peppers when I was a kid. I always loved that it seemed to be the perfect combination especially on rainy winter nights. I have never been able to exactly replicate what I remember my mom doing, although I haven't actually ever inquired. But over the past 10 years I have definitely experimented a little bit. Like most things I make they change a bit every time because I don't keep exact track of my movements if it is not completely necessary. 

Several weeks ago Sprouts two weeks in a row seemed to have yellow and orange bell peppers on sale! Two for $1 which is incredible! Because I can't seem to pass up a sale of vegetables like that I found myself with more peppers than I was going to eat on their own. I had a lovely brain storm to make stuff peppers! ESFSW helped me with this endeavor and gets the credits for the photos! Please don't just we are working in sub-prime conditions and this project is on top of both of our full time jobs. The food we create we are also planning to be our dinner so the main purpose is to make dinner, secondary purpose is to provide blog posts! I hope in the future our photography will get more professional looking. But for now it is merely to be pictorially descriptive!

Here is what I used:

Peppers - red, orange or yellow (green work too but I like the flavor of these better)
Ground meat - I used pork sausage for its flavor
Garlic
Onion
Olive Oil
Stewed Tomatoes (canned)
Tomato sauce (canned)
Rice - I used Trader Joe's Brown Rice medley with Rice, black barley and Dikon Radish seeds
Red Pepper flakes
Worcestershire Sauce
Tabasco Sauce
Cheese - I used Herb Goat Cheese


Most of the Ingredients used! I forgot a few when I took the picture.


Here is what I did:

Chop the onion (1 small one or 1/2 a large one). 


Peel 4 cloves of garlic. I don't particularly mind the smell of garlic on my hands it is so much better than the smell of gloves from laboratory work or chemical smell (and yes I am very diligent in washing my hands in lab and when I cook!). If peeling garlic cloves are the bane of your existence then here is a tip for you. Take a clove of garlic and place it on a cutting board. Take a large knife like the one pictured with the onion in the picture above. Put the flat part of the blade over the garlic clove and with the heel of your hand smash the garlic clove using the broad side of the blade.

Smashing a garlic clove.
Once smashed the paper skin will peel off much easier!

Presto! Garlic peeled in 2 easy steps!

In a medium fry pan, heat olive oil over medium high heat. Taking the garlic mince garlic directly into the fry pan.

Olive oil heating

Let garlic simmer 1 to 2 minutes, then add onions and cook til the onions are starting to soften.

Garlic simmering - breath in the aroma!
While the garlic and onion are cooking put a pot of water on the stove and bring to a boil. Depending on the size of the pot, drop peppers into the boiling water and par boil for 10 minutes. This step softens the peppers so it doesn't take as long to bake the peppers before they soften in the oven. Many of my early attempts ended with me looking sadly into the oven after the peppers had baked for an hour with the peppers still pretty crunchy!
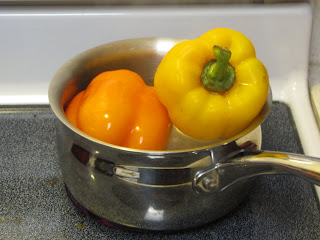
I should have used a bigger pot! I had to boil each individually.

While the peppers are boiling the onions and garlic should be done and it is time to add the sausage.


I don't particularily like handling raw meat so I just drop the whole thing in the pan and then break it apart as it cooks with a spoon.


Both me and ESFSW like a little heat to our food so I added some red pepper flakes (just like the ones you get with pizza) to the meat as it cooked. If you don't like spice, you can leave this out. Although I would encourage you to try just adding a bit. A little heat can help bring out the flavors in foods.


Once the meat is completely browned, remove from heat


And back to the peppers! If you are starting to feel like there are a lot of steps, their are! If you are a good multi-tasker it isn't too bad, or if you have a good assistant the process is pretty easy. The hardest thing in cooking things that have multiple steps is the timing of everything and using the waiting time to work on other steps.

So the peppers - doing this next step immediately after they were removed from boiling water will cause small finger burns! Please let the peppers cool down a little bit before handling. Next they need to be de-seeded. What I do is take a small sharp knife and cut a circle around the green stem. Then pull on the step and seeds should come out easily. Any loose seeds in the bottom of the pepper can be dumped out.


This time around I decided to cut the peppers in half, but they can be stuffed whole as well. I cut the peppers the long way and arranged into an baking dish.


Now in a large bowl, combine the cooked meat, drained diced tomatoes and the cooked rice medley (I cooked this the night before). If you tasted the meat and want more spice feel free to add some more spice at this step.


Now evenly divide the meat and rice mixture and spoon into the bell pepper halves.


Now for the sauce! Pour the can of tomato sauce into a small bowl and stir in a dash of both Worcestershire sauce and Tabasco. This just give a little bit more complexity to tomato sauce which quite frankly is pretty bland in my opinion. The Tabasco beyond adding some heat also cuts the sweetness of both cooked peppers as well as canned tomato sauce due to the high vinegar content.


After mixing, pour the sauce evenly over the peppers.


Drop large chunks of goat cheese on top each pepper. If using cheddar or some harder cheese wait to top the peppers with it until half way through baking. Place the peppers in a pre-heated 400 F oven and bake for 30 minutes. (Add shredded cheese after 15 minutes and bake til cheese is melted and bubbling)

And here is my final product! Aren't they beautiful. If you want a more toasted top, after you bake them turn on the broiler to low and cook for 2-5 minutes. Watch them carefully so you don't burn them!


ESFSW and I between use ate 3 halves of the peppers and the rest were consumed as leftovers through out the week. We had them on their own because we weren't super hungry, but they can be served with a nice green salad if you need more to eat! Although we did enjoy them with a nice bottle of wine white acquired from the local Trader Joes.


As with most of my cooking, feel free to experiment and deviate from the recipe above. My goal is to provide general guidelines for preparing delicious food, but I want to encourage you putting your own flare on your dishes! I would also like to note that these truly are an balanced meal in and of themselves. Balance of protien, vegetables and grains with a little cheese to boot! I haven't tried to make these vegetarian, but if you are one you could probably subsitute beans for the meat with relative ease. Or just use a rice and lentil mixture. If you frown on rice due to its lower nutritional value feel free to use a more nutrious grain like quinoa.

Bon Appetit and Happy Cooking!